Why Your Website MUST Be Secure in 2023

Securing your websites with SSL
Secure Sockets Layer (SSL) certificates are a must have in 2023. A few years ago you could get away without having one installed without too many real repercussions. These were the golden times for most beginners that just wanted to get a site working quickly without dealing with any “technical stuff”.
Unfortunately for this crowd, that trend ended in 2017 when Google updated their policies around sites not running an SSL. You have probably seen the result of these policy changes. Unsecured sites throw up a big red error page reading something along the lines of “this site is unsecured and you may be in trouble if you proceed”.
Even if this scary message page isn’t driving your users away, Google will heavily penalise your site if it’s not running an SSL. This is a very big issue. Websites need users, and the vast majority of users come from Google.
Installing an SSL can be a bit intimidating for the uninitiated but there’s really no excuse for not having one in 2023.
In this article we’re going to run through our approach to installing SSL certificates. We use a free service called Let’s Encrypt and a deployment tool called Laravel Forge (Forge for short). These tools rely on you having some understanding of how servers work and how to use the command line.
If you’re not technical or don’t have a developer to help you through the following guide, reach out to use right now. We’ll get your site secured straight away.
Before we get into the guide we’re going to explain a little about why SSLs are important. If you’re simply looking for the steps to installing your SSL, jump down to the instructions.
Does a SSL certificate protect me from hackers?
SSL certificates won’t stop hackers from targeting you or accessing your data. That’s a much more complex problem to solve. What they do is make it very difficult for “hackers” to intercept the data coming into and out of your website.
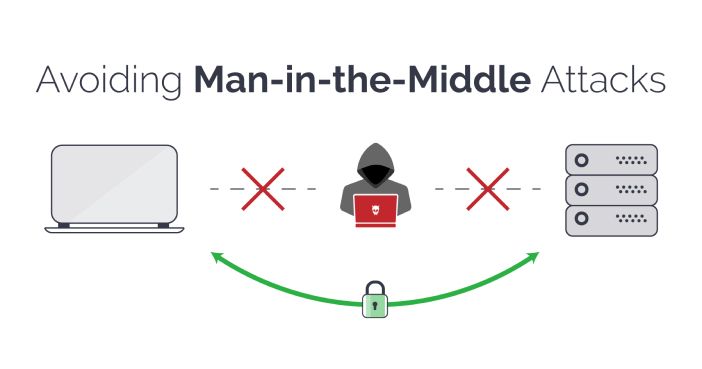
The problem with running an unsecured website is if an attacker manages to intercept your website’s data they can theoretically see the personal details being sent back to the server. There’s a whole range of other nasty things an attacker can do with this data. The bottom line is, if your site isn’t secured with a certificate you’re inviting trouble.
How can I tell if my site is secured?
Easy - open your website and look at the URL bar. If your address starts with “https://” then you’re running a valid certificate. There will also be a little padlock next to the search bar.
If your address doesn’t have an “s” at the end of the http, then you’re not secured and should take the steps to install a certificate immediately.
Why don’t websites run SSL certificates by default?
This all boils down to money. Secure sockets layer certificates require a trusted third party to act as the authenticator and sign digital certificates. Just a few years ago this process wasn’t cheap. Before SSLs became mainstream, running an authenticated and secured website was reserved for payment services and corporate information services.
Attitudes to SSLs really only changed a few years ago when Let’s Encrypt was founded in April, 2016. The mission of this non-for profit project was to bring encryption to the web by offering hassle free encryption at no charge.
Let’s Encrypt have been incredibly successful. SSL certificates are standard practice for modern web development. And with support from browser developers like Google and Mozilla, they’re on track to make encrypted connections the default use case for the entire web.
Laravel Forge - the answer to renewing SSLs
At Clean Commit we manage the hosting for our clients. Since we’re making regular changes to the code base, it’s WAY quicker to manage the server ourselves. To make this job easier we use Forge.
It’s worth noting that if your site is running on managed hosting like Bluehost or GoDaddy, then Forge won’t work for you. Without getting into the details, this solution is reserved for sites running on self managed hosting like Digital Ocean or Linode.
Forge is an awesome deployment tool. It installs all the up-to-date services, facilitates easy continuous deployment and takes the hassle out of deploying websites. One Forge feature we love is its LetsEncrypt integration that automatically installs SSL certificates.
No more setting reminders to reinstall certificates when they’re about to expire. This makes us (and our clients) very happy.
Unless you need to manage multiple websites on different servers, then Forge is probably overkill and you’re better to install your SSL manually.
Before you jump into installing the certificate, you’ll want to check if your site supports the ACME (automated certificate management environment) protocol. If your site is running on managed hosting like Bluehost or GoDaddy then you’re probably out of luck. You can check if your hosting makes the cut over here.
Without the ACME protocol being supported the certificate won’t auto renew after 60 days. This ends up leaving you with a lot of work and running the risk of forgetting to secure your site.
How to set up your LetsEncrypt SSL
Before you dive into this tutorial, there are a few pre-requisites:
You’re comfortable using the command line You manage or own a HTTP website that is online and has port 80 open You’re running a server that is accessible through SSH to run commands as the root user
Using Certbot on your server
In this guide we’ll be working on a server running Ubuntu 18.04 and will use Certbot to automatically renew our SSL certificate.
To begin, log into your server via SSH. Make sure you’re logged in as a user that has root privileges. Once you’re logged in, install Certbot. Start by adding Certbot PPA to a list of repositories on the server.
sudo apt-get update
sudo apt-get install software-properties-common
sudo add-apt-repository universe
sudo add-apt-repository ppa:certbot/certbot
sudo apt-get update
Next, install Certbot with the following command.
## If you're using Apache
sudo apt-get install certbot python-certbot-apache

## If you're using Nginx
sudo apt-get install certbot python-certbot-nginx
Once Certbot is installed, set up your certificate:
## If you're using Apache
sudo certbot --apache

## If you're using Nginx
sudo certbot --nginx
At this point Certbot will prompt you to enter your email address. You’ll receive some details about your certificate status. You’ll also let Certbot know which domains you’d like it encrypt. From here Certbot takes care of the heavy lifting and will handle the automatic renews for you.
If you’re running a different operating environment and want to give Certbot a try, head over to their website for further instructions.
To install Certbot on other environments please check Certbot website for more information.
My website hosting won’t let me install Certbot
If you can’t log into your server using SSH (i.e. you have a cpanel instead), chances are you won’t be able to install Certbot.
Don’t stress - you will still typically have a few options. The first one is to ask your provider if they issue SSL certificates. Hosting providers like Bluehost and GoDaddy will secure your website for an extra charge.
If you’re with a more boutique hosting company and they can’t do the SSL for you and don’t give you the option to do it yourself… then it’s time to get a new hosting provider.
In our opinion, DigitalOcean and Linode are the two best virtual hosting providers. They’re cheap, fast and relatively easy to deal with.
The only catch of these providers is knowing your way around the command line. DigitalOcean has a great one-click WordPress installation feature, but there are still a few tricks you need to know to make things go smoothly.
If you’re interested in getting set up with one of these providers but aren’t confident playing around with the technical stuff, send us a message through our contact form. Our team of experienced developers will get you set up quickly for a super reasonable price.