Speed Up My WordPress Website

If you’ve had the thought “I need to speed up my WordPress website to stop my potential clients from leaving before they can learn what I have to offer”, then you’re on the money.
Slow websites lose business. It’s a fact backed by Google’s mobile speed study. This study discovered that the average mobile website takes a yawn-inducing 22 seconds to load. In contrast, most users will only wait 3 seconds before they leave!
Everyone expects your website to be fast and frictionless, especially the potential clients you care about. Your website is really the first interaction with your customers. There’s no room for keeping your potential customers waiting.

Imagine this problem in a different setting. Your potential customer has agreed to a Zoom call to hear your presentation but you spend 10 minutes trying to get your audio working.
How would this make you feel? Personally, I’d be a sweaty mess. There’s no way that client is signing with you. How can you guarantee you’ll get them closer to their goals if you can’t even get the simple stuff sorted?
But enough harping on about the problem. You’re here looking for solutions. You already know that your site is slow and you’re probably looking for fixes you can apply immediately.
This article will list the fixes you can make yourself immediately before moving onto some of the more technical stuff that you’ll need to line up with your developer or support team.
Keep in mind that some of these fixes are more important than others, so you necessarily need to chase after all of them.
Use this article breakdown if you want to jump ahead to specific suggestions.
1. Figure out how fast your website is going
2. Immediate fixes you can make without technical support
- Great hosting that serves in your country
- Upload images that are the target dimension
- Compressed images in the right format
- Removing unused plugins
- Configure your site’s DNS to use Cloudflare
- Make use of Google Tag Manager
- Updating your WordPress version
- Updating your plugins
- Load your videos onto Vimeo or YouTube
- Eliminate render-blocking resources
- Keep your site secure
- Delete images in your media library if you don’t use them
3. Advanced fixes you need technical support for:
- Minify your files
- Optimize your HTTP requests
- Avoid using redirects
- Set up bytecode, object, page, and CDN caching
- Update PHP
- Remove old plugin database tables and files
- Use lazy loading images
- Optimize your font requests
- Enable preloading of external fonts
- Reduce the number of post drafts that are saved
- Use Nginx or LiteSpeed
4. Other suggestions:
- Split up your posts
- Set up an SSL on your website
- Ditch WordPress and go with a static site to get to perfect performance
1. Figure out how fast your website is going
You’ve realised your site is slow and causing issues but you need a measurable baseline. The best way to do this is to use a few free tools to get a review of your site.
If you’re taking this situation seriously, we’d recommend using a few sites to check your performance. They each have their own quirks and sometimes spit out results that are skewed.
The differences don’t matter. Improving your score across the board does.
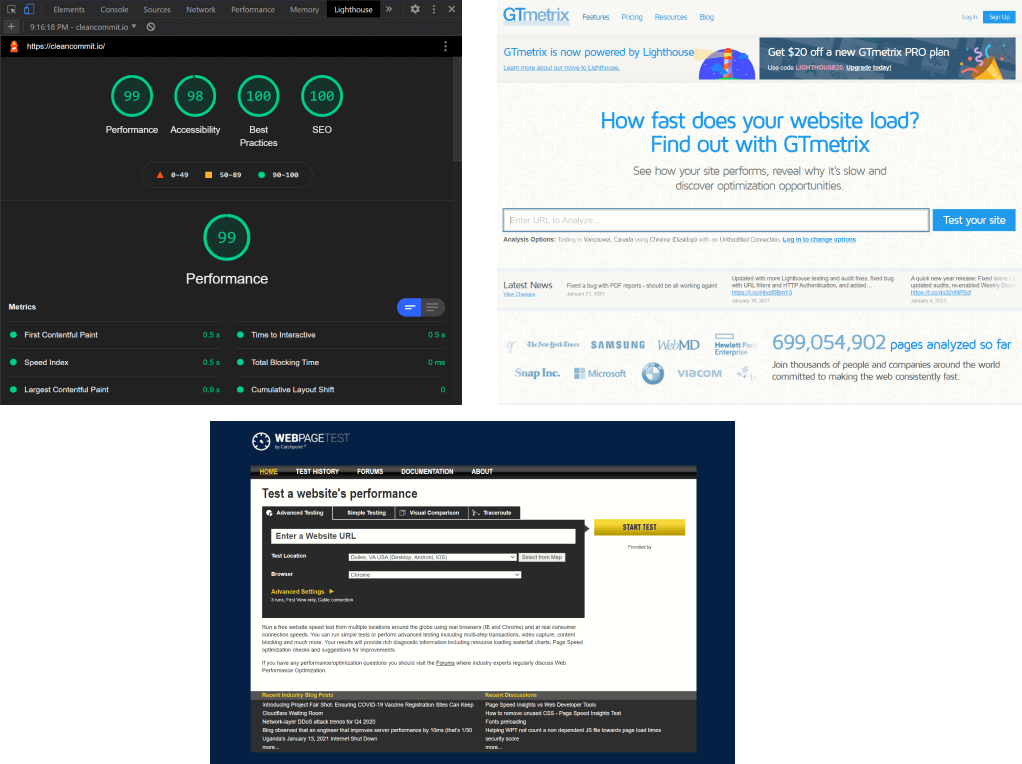
It helps to write the metrics down, so open a new spreadsheet and write down these performance testers:
- Google Lighthouse
- GTMetrix
- Webpagetest.org
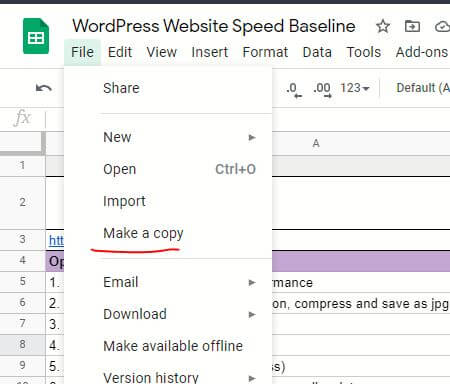
Here’s a shortcut. Simply copy this Google Sheet template we created so you can hit the ground running. Once you’ve got the sheet open, you can save your own version by going to File > Make a copy.
Let’s get that baseline. Fire up Google Chrome. If you haven’t installed Chrome on your computer for whatever reason, go get it now. It comes packed with super valuable free auditing tools.
Once you’ve got Chrome installed, open an incognito tab and head over to your website. You can run this process without opening an incognito tab but you run the risk of browser plugins impacting the audit results.
When your site has finally loaded, right-click anywhere on the home page and select Inspect:
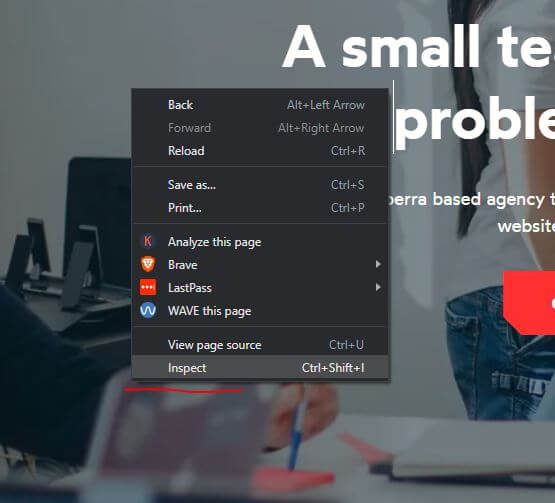
When the page inspector opens up, you’ll see a bunch of HTML in a new window. You should be able to find a tab called “Lighthouse”. If you can’t see it straight away, it may be collapsed into a menu like this:
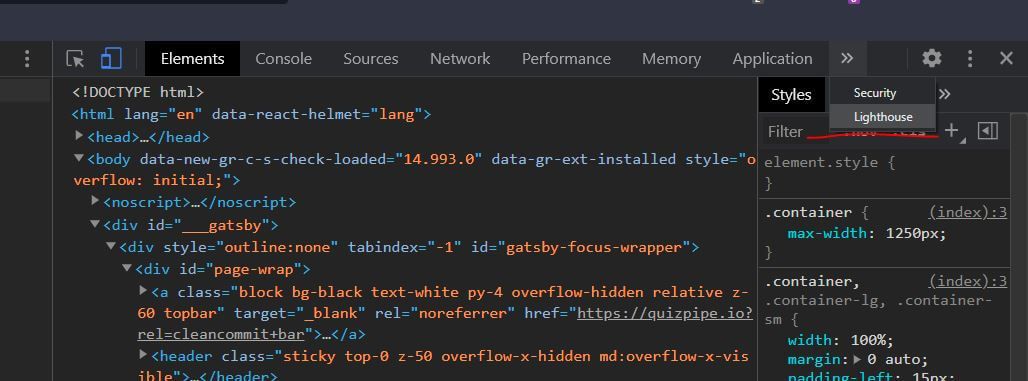
With Google Lighthouse now open all you need to do is untick Progressive Web App and press Generate report.

Save the result of this audit in your spreadsheet as a baseline for Google Lighthouse! Let’s move on to the next auditing platform; GTmetrix.
Auditing your site with GTmetrix is much more straightforward than Google Lighthouse. Simply head over to https://gtmetrix.com/ and plug your URL into their search bar.
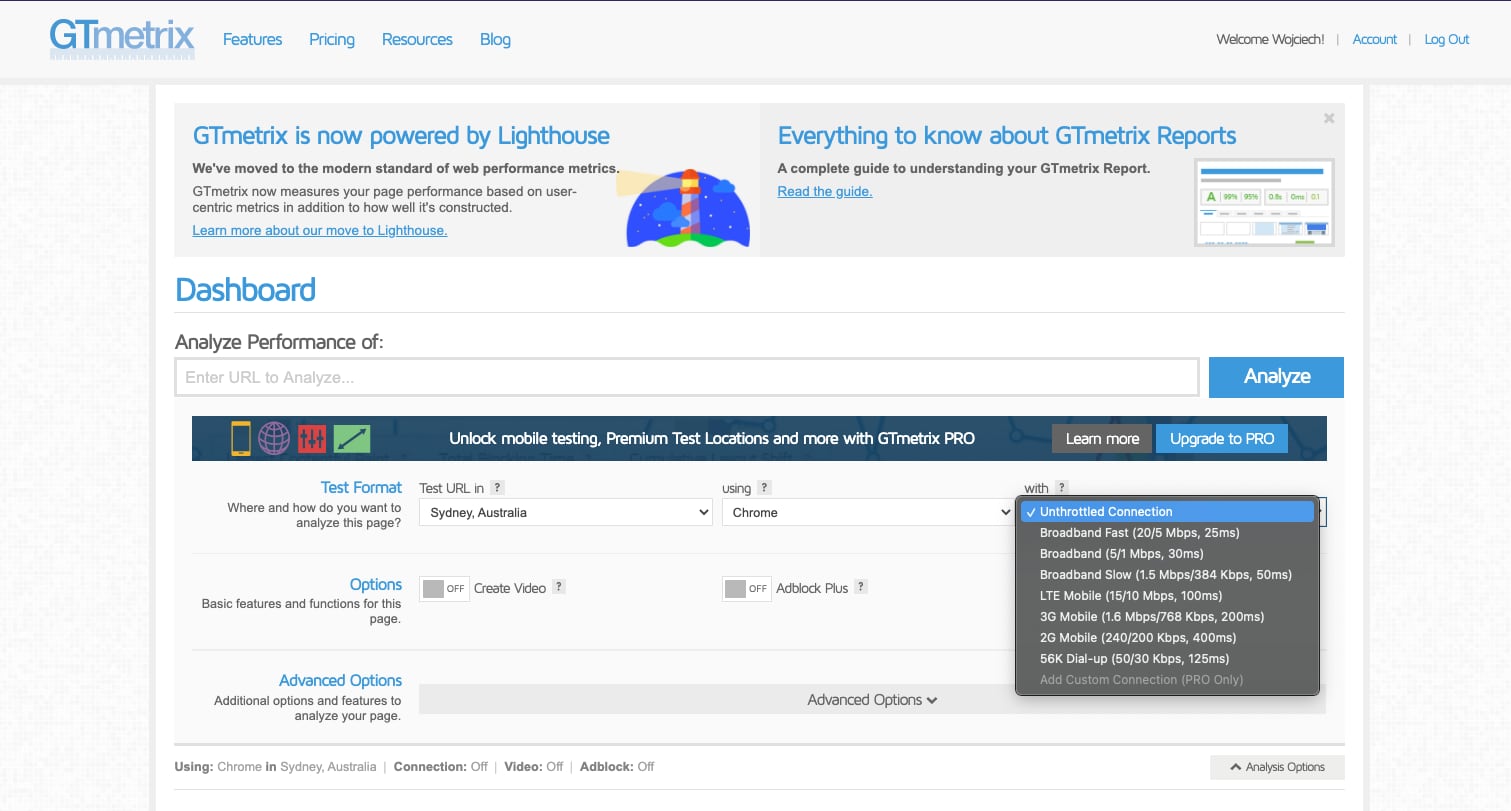
Grab your result and plug it into the spreadsheet.

Finally, open webpagetest.org and enter your URL in the search bar. Pick the closest server to where you’re living and run the audit. Record the three web vitals metrics in your spreadsheet.
Chances are that at least two of the three tools will spit out very similar results, which is great news. You don’t need to use all three but it’s a good practice to stick to.
Check your web page size
Web page size and speed are very important metrics. They are closely related and have a great influence on the performance of your site. You can check the page size with the SEO platform Sitechecker. To check the page size, you need to enter the URL of the web page and you will get a detailed report and optimization tips.
You now have an accurate baseline so it’s time to move on to making changes to your site.
2. Immediate fixes you can make without technical support.
These are all changes that you should be able to make with a little Googling without knowing how to code. Start here to see if you can solve your WordPress website speed issues.
1.Great hosting that serves in your country
Hosting is at the top of the list because it makes the biggest difference. Boosting the processing power and memory of your hosting makes a huge difference to your website speed.
The two services we recommend are DigitalOcean and Linode.
Both of these services sell self-managed cloud hosting. That means you’re on the hook for managing your own server. DigitalOcean has come a long way recently with one-click WordPress installs and a bunch of other great features that make your job a lot easier.
Signing up with Linode or DigitalOcean means you’re not sharing your virtual private server with any other business. This is a big benefit because entire servers can get black-listed. The actions of a few can affect the many.
The downside of these services is that you’re on the hook for managing the server if anything goes wrong.
If that sounds like more than you want to handle, you should consider Cloudways. They resell DigitalOcean hosting but provide some basic management services on top.
It’s worth noting that we are not affiliated with any of the platforms recommended in this article.
To be clear, they won’t fix your website’s code or plugins but they will get your server back up and running if it crashes!
Migrating your website to a new hosting provider can be a bit of a pain, but there are plugins like All-in-One WP Migration that will get you moving.
2. Upload images that are the target dimension
Images that have dimensions significantly bigger than they’re supposed to, end up with file sizes that are too large for the web.
This was a problem for a recent client of ours. They were loading raw images directly from a high definition digital SLR camera onto their website. Despite the images first going through a compression algorithm, the files were still HUGE.
Start by figuring out how large your images should be. Consider that most full-width laptop screens are about 1920 pixels wide. Unless you want your image to be full-screen sized, they should never be wider than this.
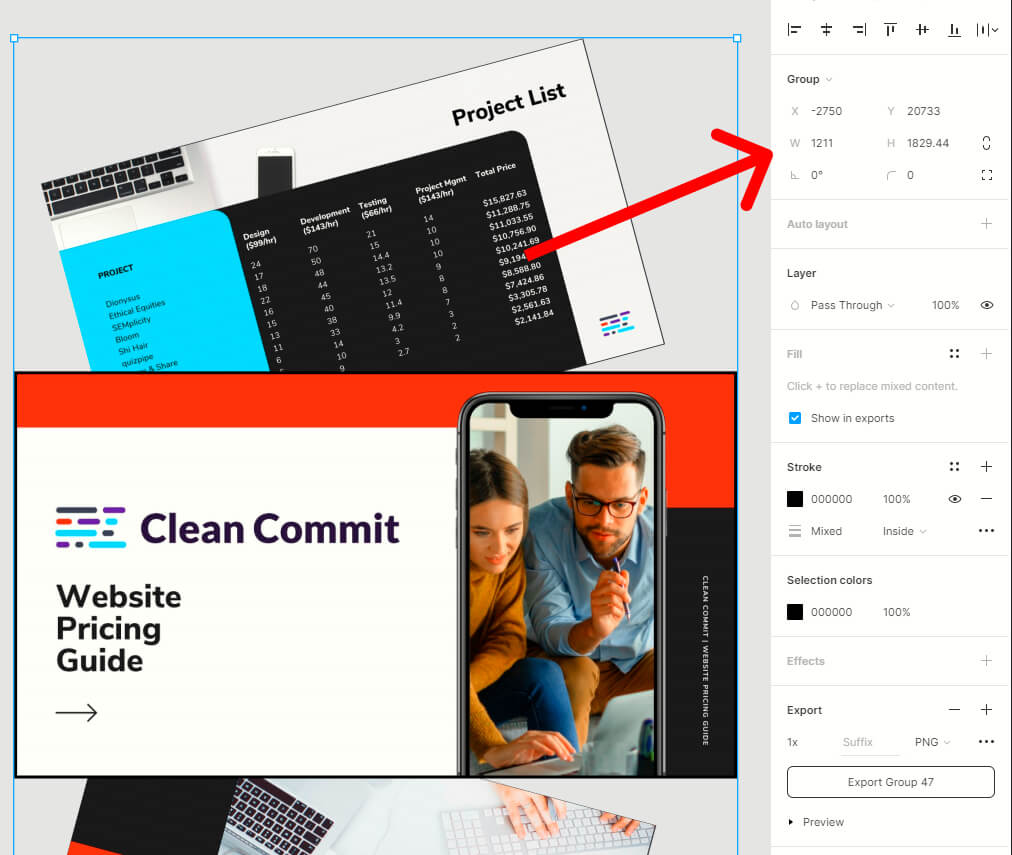
If you’re not sure how to save images to certain dimensions, you can use a free web design tool like Figma. You can use Figma straight from your browser!
When you’ve signed up, paste or drag your images into Figma. Click on your image and look over in the right-side navigation panel to change the height and width.
3. Save your images in the right format and compress them
Images uploaded onto a blog should be one of two formats: JPG or PNG.
Here’s the simple rule to know which file type to use: If any part of your image is transparent use png. If not, use jpg.
PNG file types contain more information, like transparency, so they’re naturally “heavier” than JPG. If you’re ever in doubt and want to keep your files small and light, go with JPG.
It's worth mentioning that there are newer image formats, specifically WebP, that are better suited to the web but we're going to leave them alone for this part of the guide.
The smaller your image file sizes, the less data the browser has to download when a new visitor arrives on your page. So the aim is to get those files as small as possible.
If you’ve followed step 2 and have saved your images to close to their target dimensions, then all that’s left is to compress the images. The easiest way to do this is to open up TinyPNG and drag your images onto the screen. Once they’re downloaded, save them back onto your computer and upload them onto your website.
Make sure you do this for every image on your site.
If you want to save some time, you can also install TinyPNG’s WordPress plugin to automatically optimize images as they’re uploaded.
Although we wouldn’t recommend using this plugin, or any plugin whose job can be achieved without adding additional code to your website. In this case, you can achieve the same results by installing the ImageMagick utility onto your server.
4. Removing unused plugins
As the fellas over at Servebolt have stated; WordPress is not slow. It’s what we add to WordPress that makes it slow.
This boils down to the plugins you use on your site. Plugins are really just collections of code. And some plugins need chunky libraries and dependencies to work correctly, which means your site goes slower at their expense.
The “plugin problem” isn’t that straightforward though, because it’s not the volume of plugins that cause issues, it’s whether they’ve been developed with performance in mind. A single plugin can cause your site to come to a grinding halt if it’s poorly optimised.
Plugins don’t get installed in isolation. They create their own tables in the database, add files to your server and come with their own code. They really are extensions of your website.
Some very common plugins like Yoast can have a 3.4-second impact on your website’s backend load time. Now that only translates to a few milliseconds to the end-user, but the point is that even popular plugins can have unintended performance impacts.
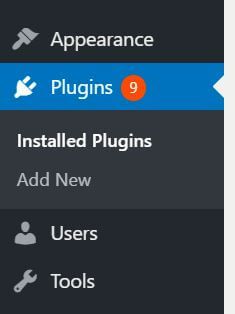
Luckily there’s an easy solution to this issue; purge any plugin that’s not 100% necessary. Head over to your plugin list in WordPress.
Go through each plugin one-by-one and ask these questions of your plugins:
- Am I actively using this plugin?
- Is this a “nice-to-have” or an absolute necessity?
- Can I achieve this functionality any other way - for instance a code snippet, a server-side implementation, or any other way that doesn’t slow my site down?

This last point may be tricky to work out if you’re not technical. If you get stuck, you can always post the question onto the WordPress subreddit and one of the helpful souls over there will give you an answer.
Unfortunately, this isn’t the end of the plugin issue. Even after plugins are deactivated and removed, they’re still living in a non-active state on your server. Imagine you’re trying to clear bench space in your kitchen and you want to get rid of your toaster, but instead of putting it in the cupboard, it’s simply turned off and unplugged.
This analogy is somewhat accurate for a lot of plugins. Even after they are removed, the tables and rows of data they’ve introduced to the database will remain. They will often leave behind files and other artefacts after being uninstalled.
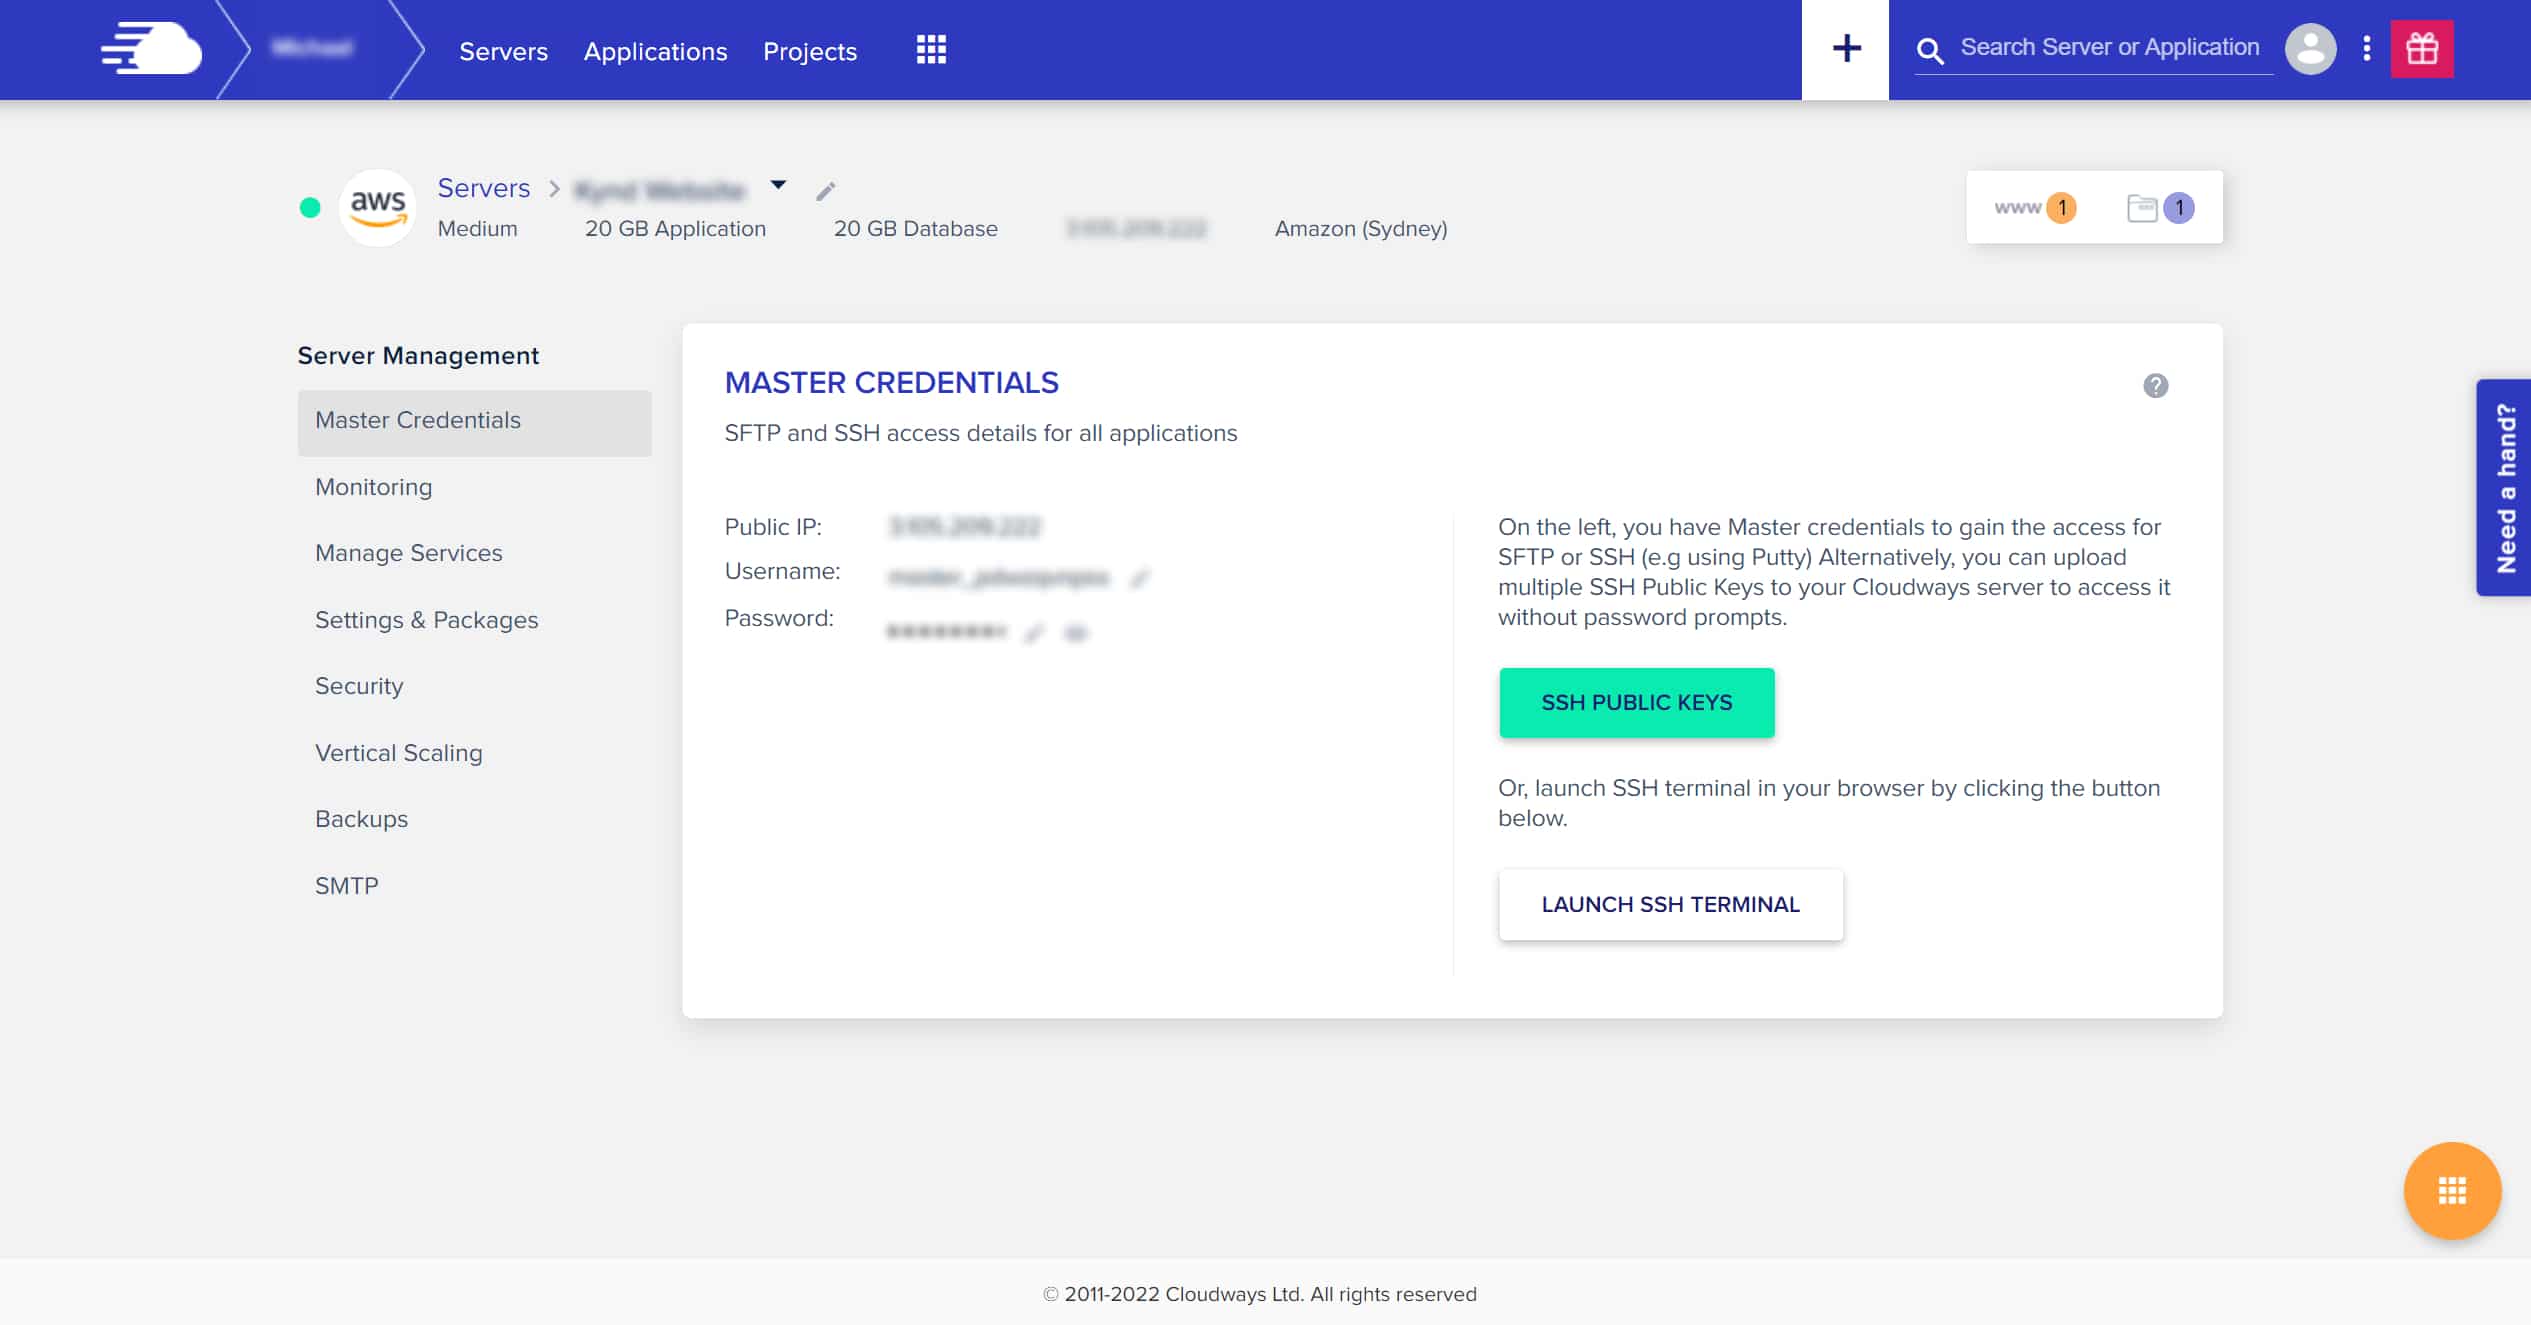
From here you need to access your database or server files directly using SSH or FTP. We’ll dive deeper into this in the advanced section.
5. Configure your site’s DNS to use Cloudflare
DNS or Domain Name Server is the phonebook for the internet. We’re familiar with entering website addresses using easy to read URLs like “cleancommit.io”, “google.com”, “facebook.com”, or “reddit.com”. However, web browsers interact with servers across the globe through IP addresses. DNS translates IP addresses into easy to read URLs.
When you purchase a domain from a provider like GoDaddy, CrazyDomains or NameCheap, they will have their own DNS servers. This is “good enough” when you’re starting out. But when you’re looking for ways to get the absolute best out of your site, it makes sense to move your DNS over to a service that is configured for speed.
Cloudflare comes with other great benefits such as a CDN for caching a copy of your website and DDoS mitigation to stop malicious attacks on your site. You’ll be in good company too, given Cloudflare handles about 10% of all internet traffic.
6. Make use of Google Tag Manager
There are a million 3rd party services that help your website do its job. Software like HelpScout, Google Analytics, VWO, Facebook Ads, the list is virtually endless.
Most of these services require some kind of integration with your website, usually by adding a small Javascript code snippet into the <header> of the website.
This results in a couple of consequences;
Each of these 3rd party services is loading external resources (sending and receiving data) every time a new web page is loaded.
Every page on your website will fire the same number of scripts and require all these services to load
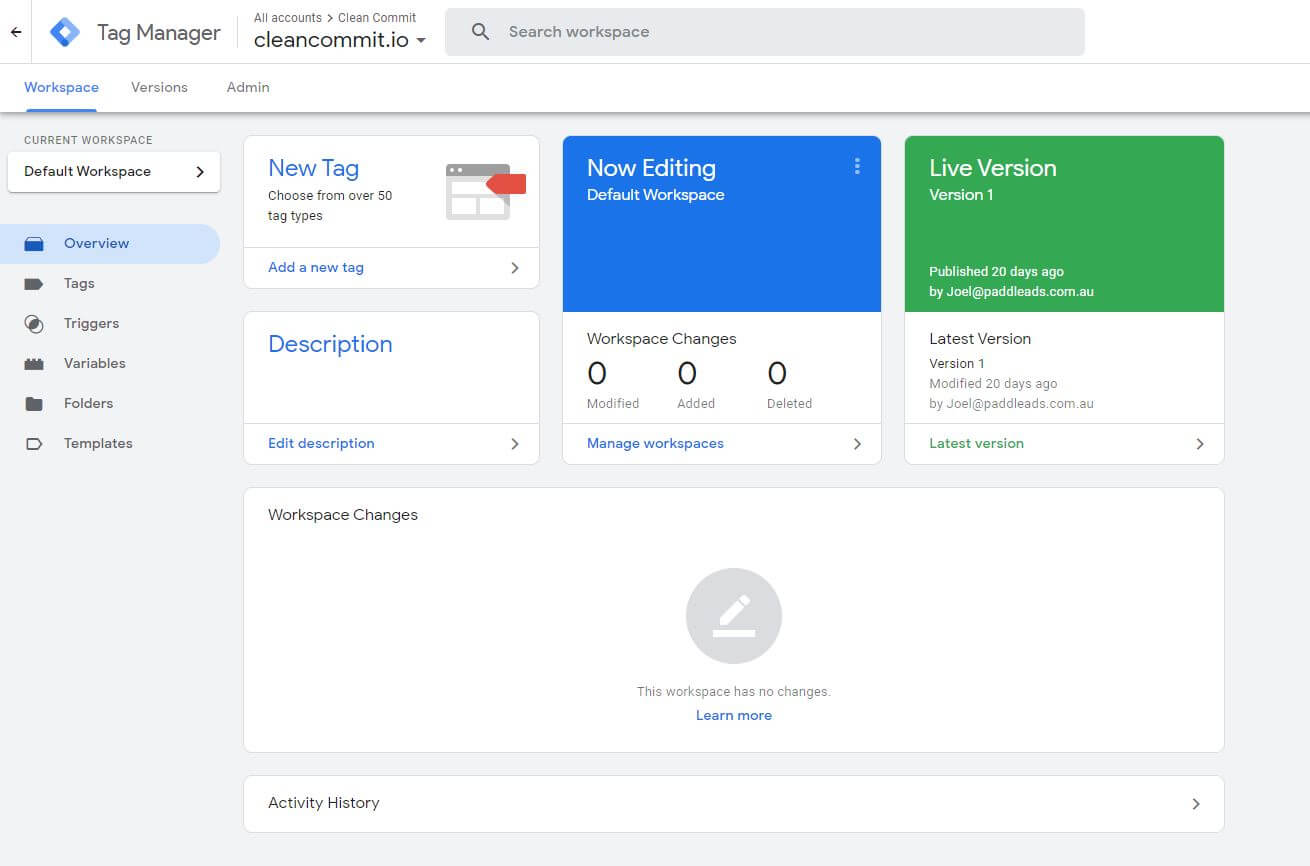
Google Tag Manager offers a convenient and flexible way to manage this mess of scripts. By adding a single script to the <head> and <body> of your website, you can now load your scripts directly inside Google Tag Manager.
Unfortunately, this doesn’t mean your website gets an automatic boost of reducing lots of code down to a little.
What it does let you do is have greater control over when particular scripts load. For instance, if you’re running any kind of click tracking or heat map like VWO, Hotjar or Crazy Egg, you turn these scripts on just for particular landing pages.
You can also create rules that delay the loading of scripts until a user has scrolled down 20% of the page. This helps reduce the amount of data a user has to load when they first open your website.
7. Updating your WordPress version
New versions of WordPress are released frequently.
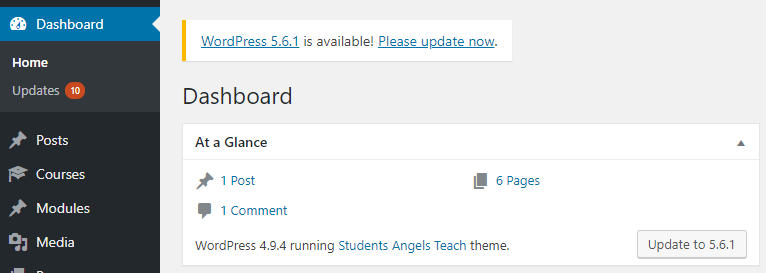
A lot of these minor updates address security issues and obscure bugs. But they also include performance increases. Just comparing version 4.9 to 5.0 of WordPress, it’s clear that some major improvements were made to the load time of a web page.
It pays to keep your version of WordPress updated. It’s typically a pretty simple process. Before you start, make sure you take a backup of your database and your site’s content just in case something goes wrong (it’s not uncommon).
A word of warning - if you’ve got a lot of plugins installed then the risk of something going wrong when you update is high. WordPress updates can often bring with them major changes to the underlying technology (like PHP) that essentially pull the rug out from underneath your plugin’s feet.
As long as you’ve taken a backup before you run the update, you should at the very least be able to roll back to a previous working version and reach out for help to get the update completed.
8. Updating your plugins
It’s easy to forget about plugins after they’re installed.
Plugins are literally extensions to your website’s codebase. As the technology that supports and runs them updates, they also need to be updated.
Anytime a major WordPress update is released, you should expect to do a plugin update shortly after or ideally at the same time. This keeps your plugins using the latest technology and hitting their peak performance.
If you’ve performed a recent update to your version of WordPress and notice that some of your plugins didn’t require an update, it’s worth investigating if the company that built the plugin is actively making updates. If it’s a simple plugin there may be no reason for an update. But if the plugin boasts a good weight of functionality, it might be time to ditch it and look for something that is actively being serviced.
9. Load your videos onto Vimeo or YouTube
YouTube and Vimeo have spent millions of dollars working out how to show their users videos quickly so their users don’t have to wait for them to load.
...And they give you the option to use their services for free!

When you upload your video to YouTube or Vimeo you instantly get a bunch of benefits.
Firstly, your videos will be loaded on incredibly fast and high-quality servers. Secondly, your videos will take advantage of high-tech delivery services that can adjust the quality of the stream to match how quick a user’s connection is. Finally, hosting your videos on an external service means WordPress can continue loading other things at the same time.
This tip has become a little less important in 2020s since auto-playing videos aren’t really a thing anymore. The popular browsers (Chrome, Firefox, Edge, Safari) came together and decided that no one should endure autoplaying videos with audio.
This decision ended an era of videos starting to play as soon as a user loaded a web page.
I think we can all agree this was a change for the best.
10. Eliminate render-blocking resources
When a visitor arrives on your site, their browser starts reading the website’s code from the top down. If the browser hits a CSS or JS “file”, it stops and downloads the file before continuing to load the rest of the website.
The time the browser is stopped, or blocked, while it loads these files can seriously slow the time it takes to load the page.
Not every asset your browser has to load is a render-blocking resource. For instance, images aren’t render-blocking files.
To figure out if your site is being affected by render-blocking resources you’ll need to do a little digging. The best option is to jump back to the start of the article where we recommended doing an audit using Google Lighthouse.
If your site is being impacted by render-blocking resources, Google Lighthouse should make it pretty clear by listing it like this:
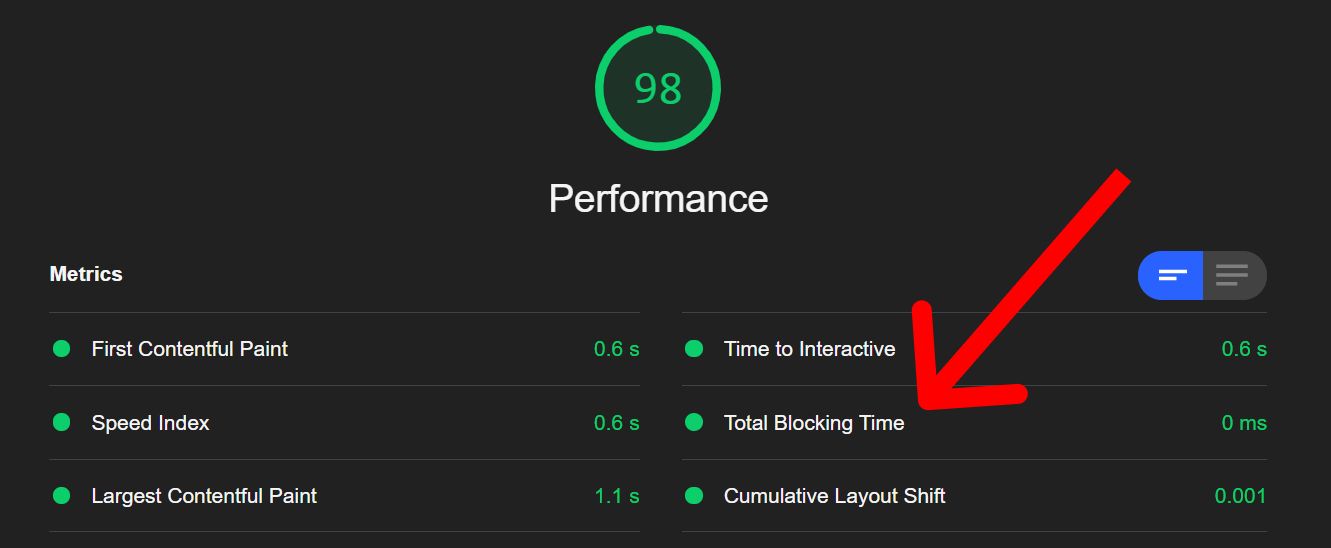
If you do find a render-blocking issue, they will be listed below the performance breakdown in the “Opportunities” section.
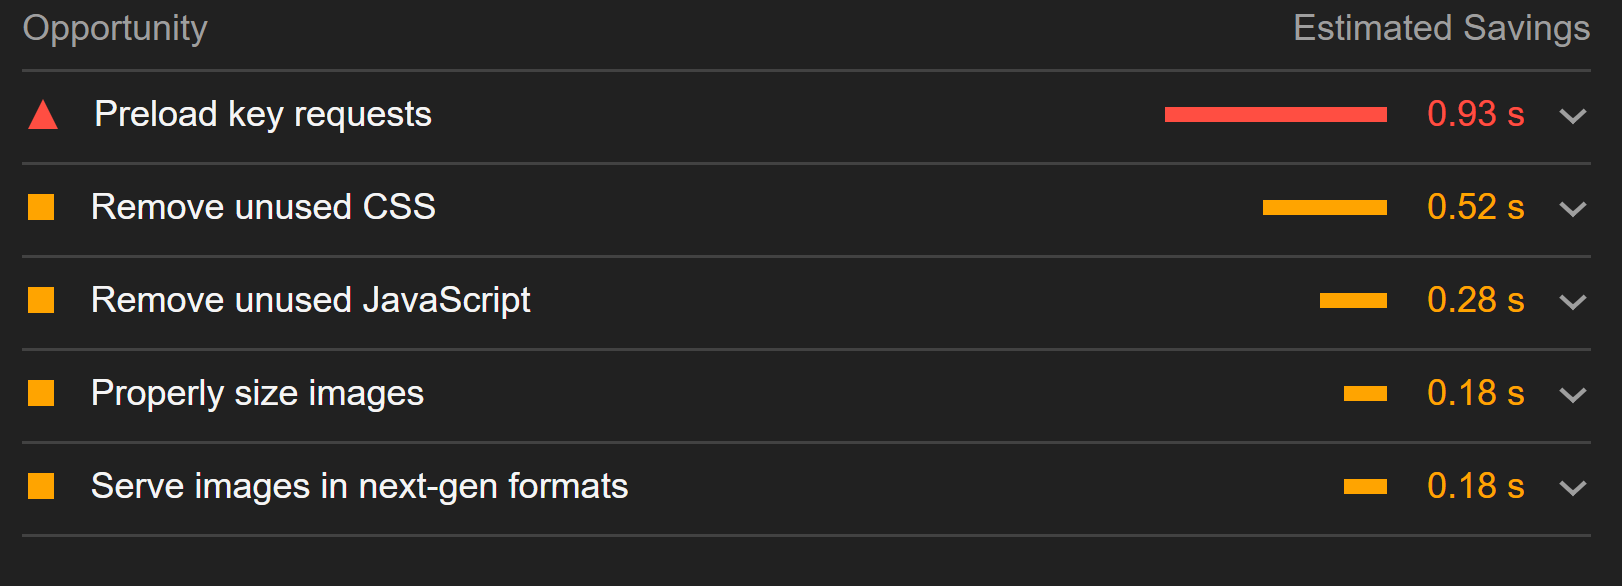
There are a couple of approaches to fixing render-blocking resources:
- Tell the browser to continue loading the resource asynchronous - or let the resource continue downloading at the same time as everything else
- Tell the browser to defer the download - or circle back once the page is loaded to finish loading the resource.
In most cases, a developer can sort these issues out but the point of this section of the article is to recommend fixes you can do immediately. And luckily enough there are a couple of plugins you can use to fix these issues; Autoptimize and Async JavaScript.
Autoptimize joins your website’s styling together, shrinks your code down and compresses it all. In a nutshell, it handles your website’s CSS optimisation. While Async JavaScript prevents JavaScript files from blocking the rest of your website from loading.
Once you’ve installed Async JavaScript, you’ll need to jump into the settings and turn it on by going to Settings > Async JavaScript and checking the box at the top of the screen.
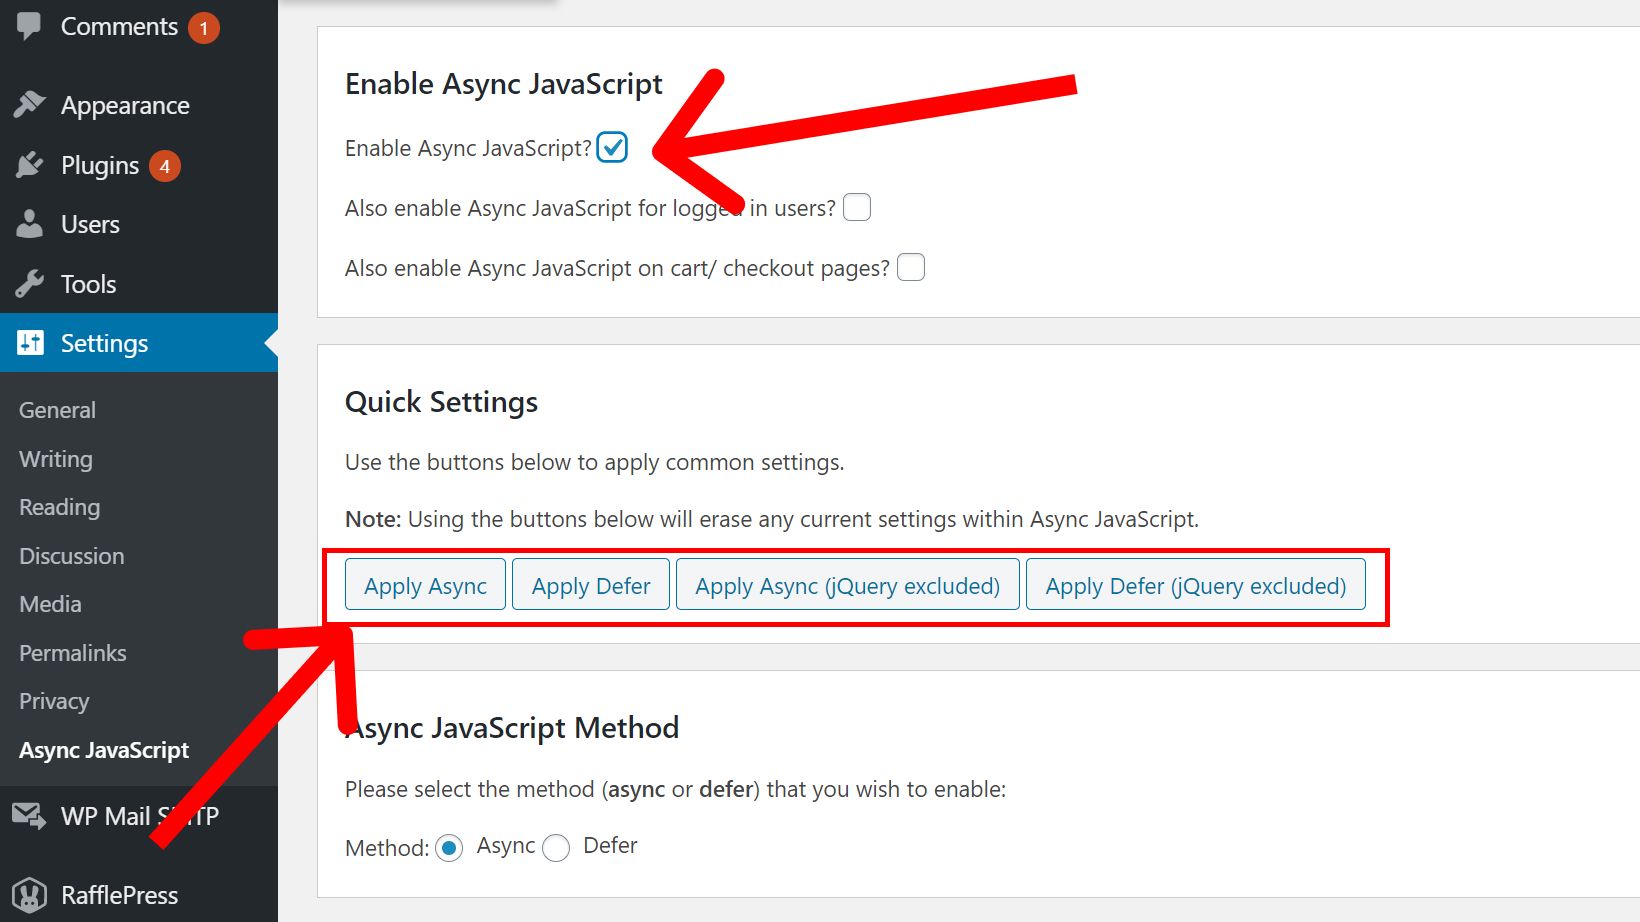
You’ll also have the chance to pick one of four default settings. We recommend starting with “Apply Async”. If you find this causes issues across your website, jump back into the settings and try “Apply Async (jQuery excluded)”. If you’re still having issues, try “Apply Defer (jQuery excluded)”.
Next, open the Autoptimize settings by going to Settings > Autoptimize. There are two checkboxes you need to tick to turn the plugin on:
- Optimize JavaScript code
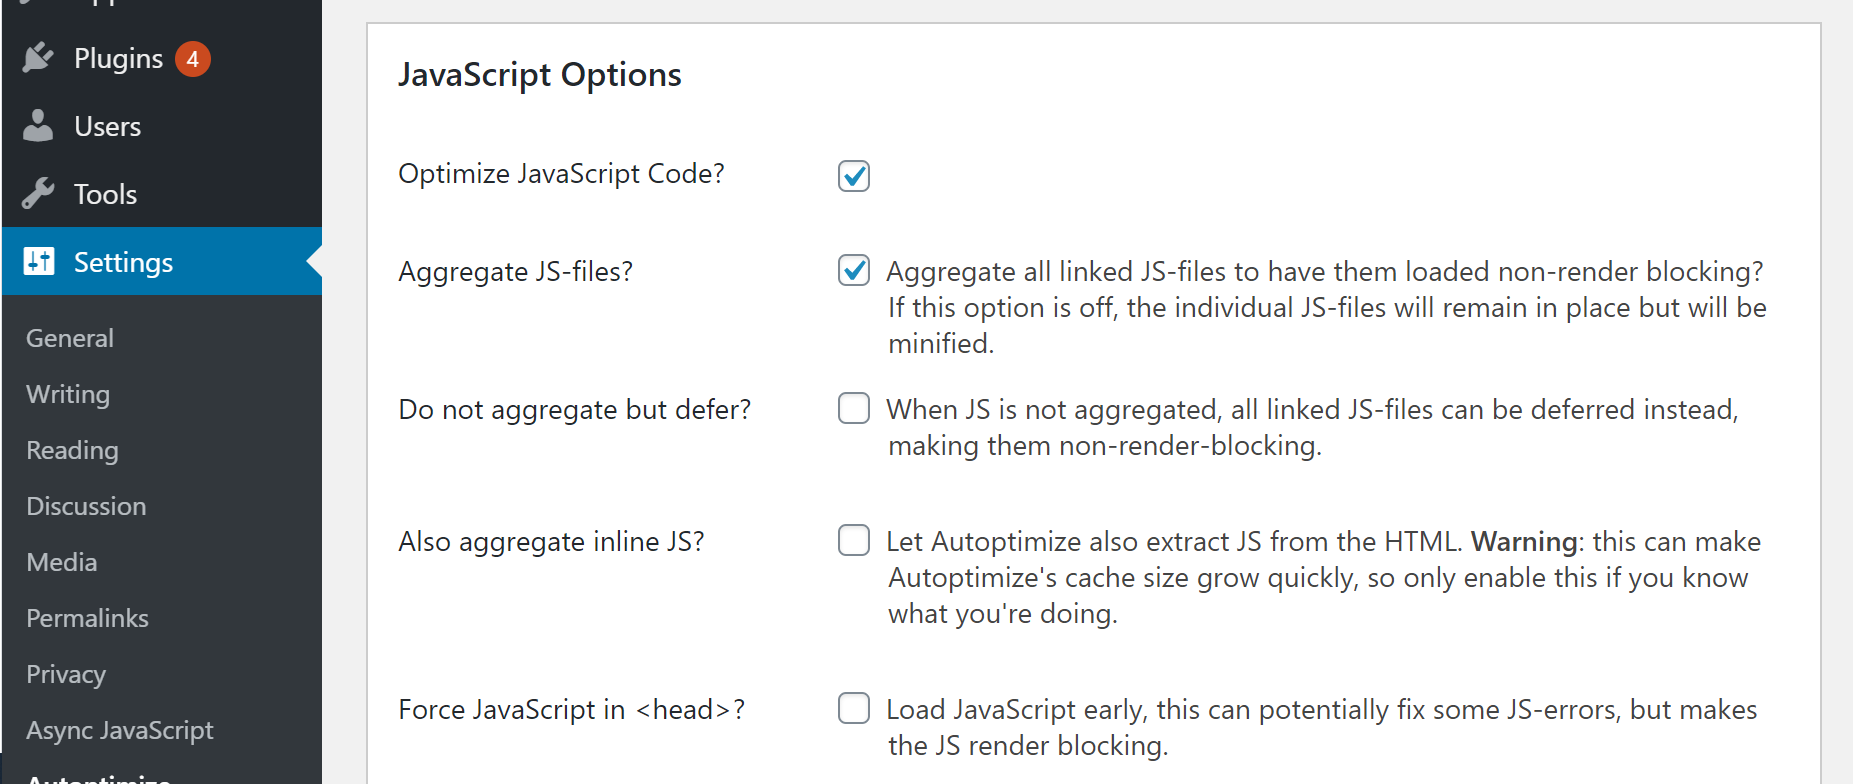
2. Optimize CSS code
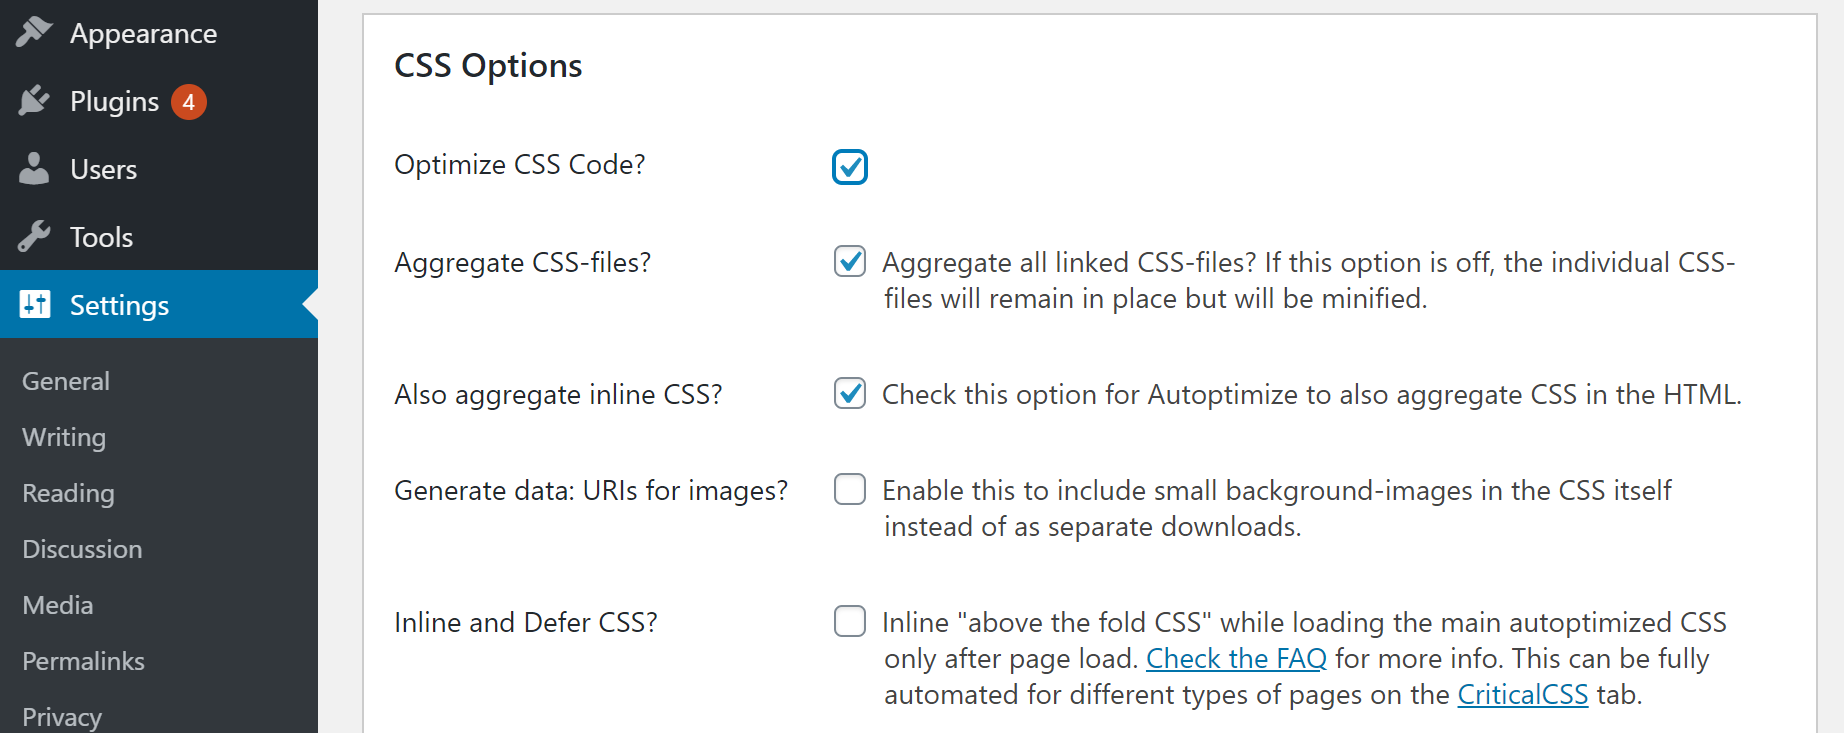
You’ll notice there’s a handful of other settings you can play around with relating to inline JavaScript and CSS. You shouldn’t need to worry about ticking any of these boxes. The default settings should do just fine.
11. Minify your CSS and JavaScript
When developers write code, they add nice indents and spacing to keep everything looking neat and tidy. This makes it easy to read back over the code and understand what each part does.
The problem with this approach is all the indents and spacing get passed along to your browser to interpret. Each space takes such a small fraction of a second it’s barely worth noting. But tens of thousands of spaces collectively add a noticeable delay.
This can be fixed by removing all the spaces in preparation for your browser to read the files.
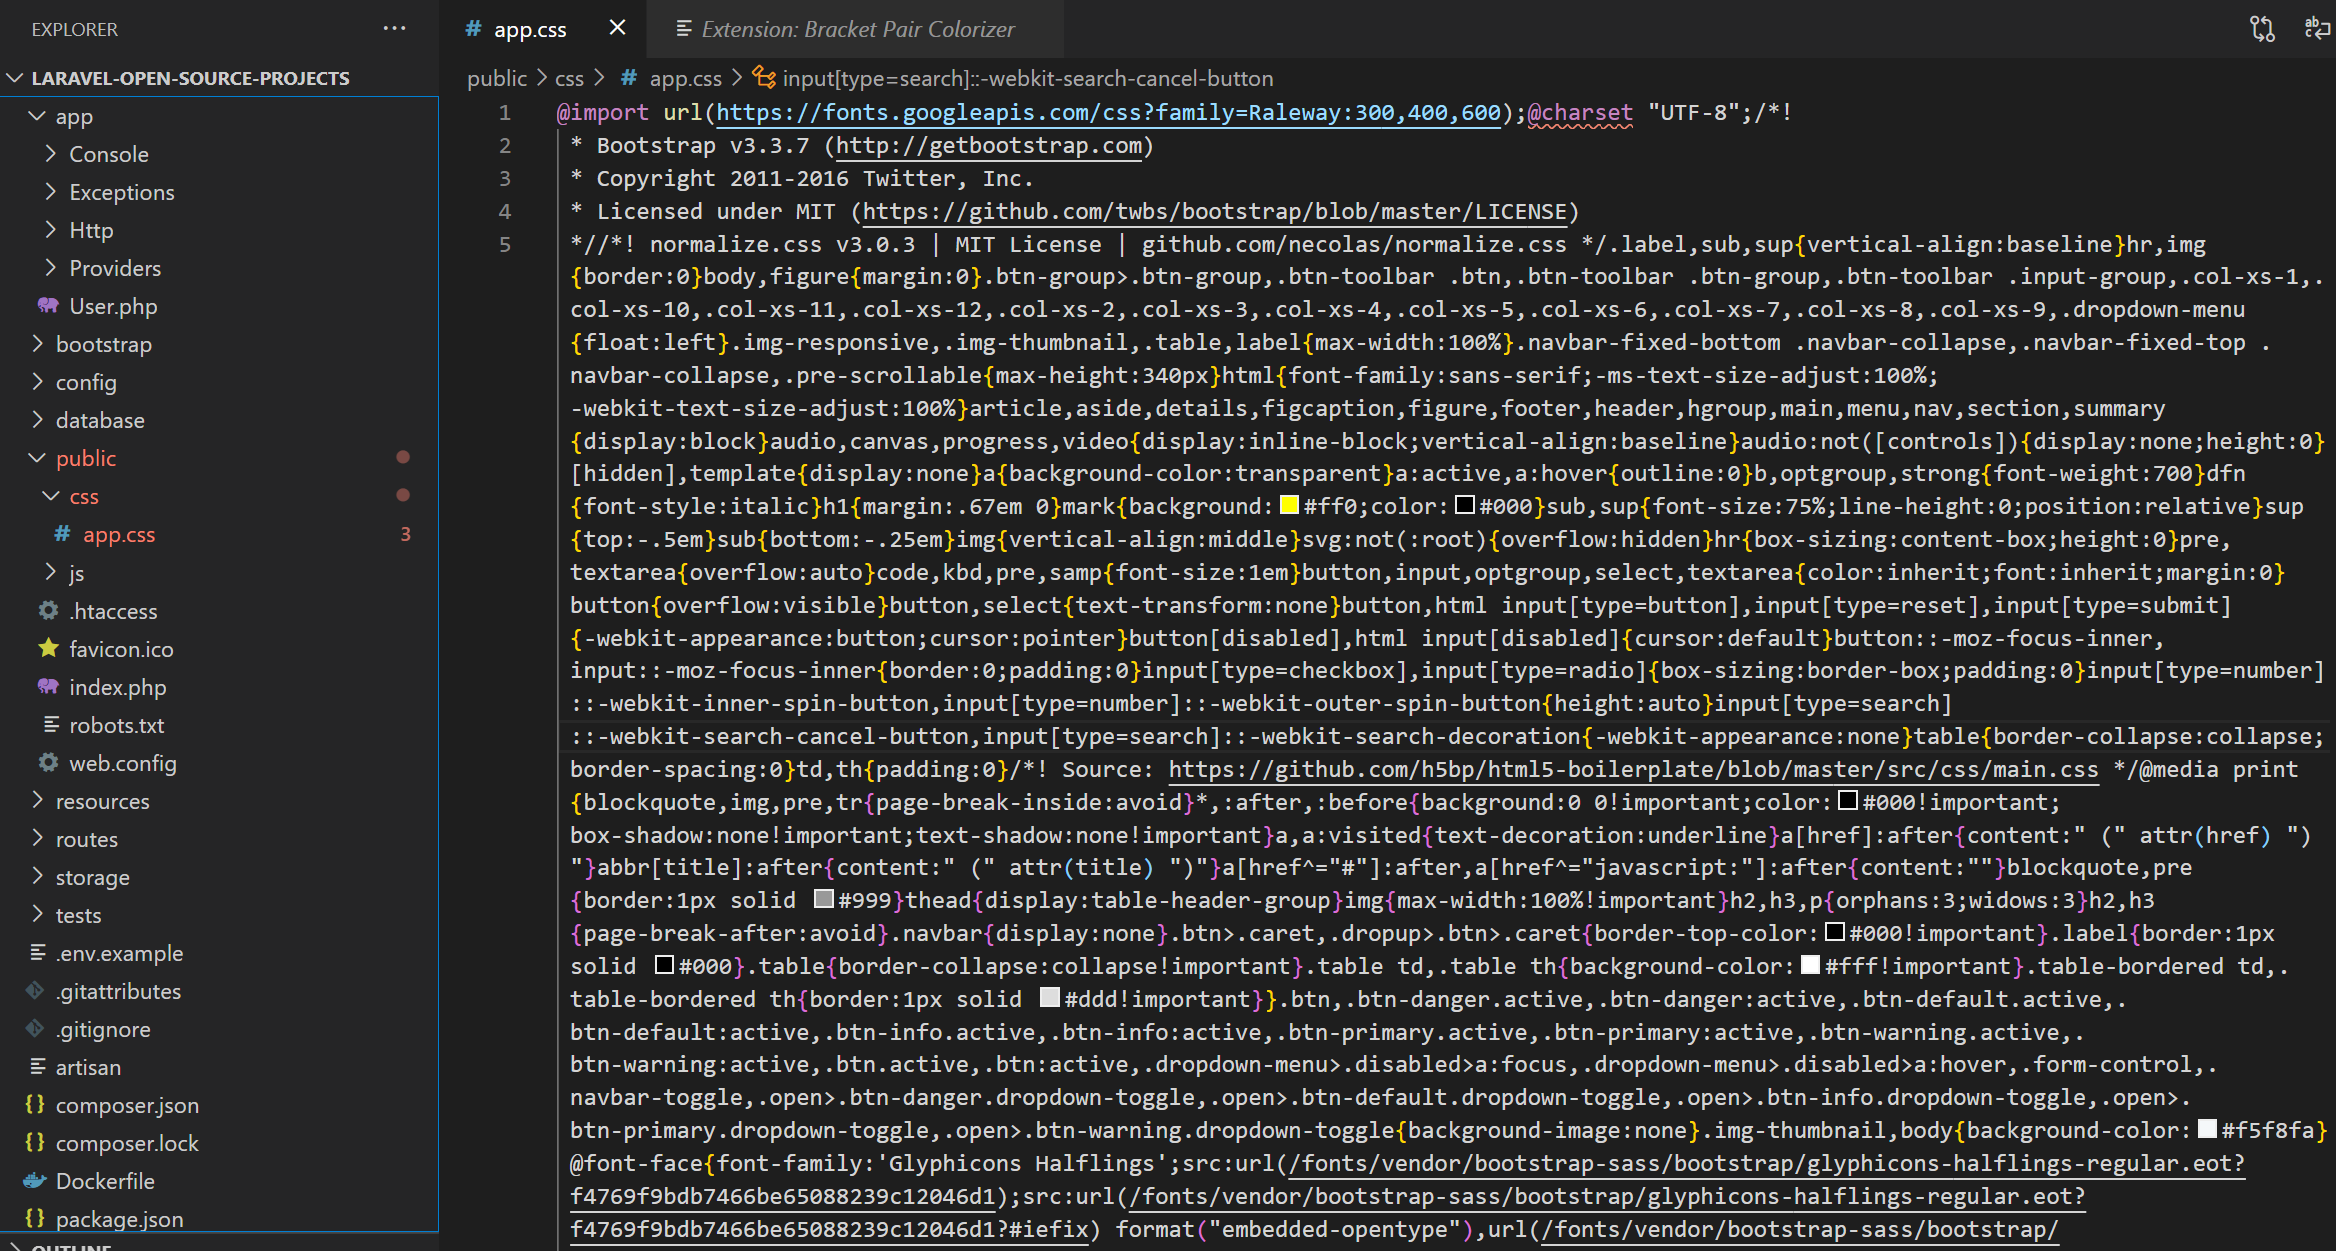
Luckily for us, if you followed the steps in 10. Eliminate render-blocking resources then the work has already been done. By turning on the CSS and Javascript minification options in the Autoptimize plugin, the spaces and formatting in your files will be removed.
12. Keep your site secure
An array of not-so-nice things can happen to your website if you let the wrong people get access. From installation of cryptocurrency mining software to malicious viruses to installation of various malware.
Getting “hacked” sounds like something out of a sci-fi movie, but believe us when we say that it happens all the time.
There are some bad eggs out there, and their intention is to use your website to make money. Most of the time this means they’re going to change how your site runs to benefit their cause. It kind of goes without saying this is going to hurt your site’s performance.
Once your site is compromised, it can be a difficult problem to un-hack. So it’s best to be proactive to avoid ever running into this situation.
In addition to keeping WordPress and your plugins up to date, signing up for Cloudflare’s services, and using a great host, you should ALWAYS use a strong, unique password. This isn’t intended to sound condescending, but weak passwords are very common.

A quick fix for this issue is using a password manager like LastPass, 1password, or Bitwarden. These platforms are brilliant because they create strong unique passwords for every online service you use, and help ensure no one but you can get access to the master account.
You can even go to the extent of setting up the Google authenticator plugin for anyone logging into your website. Google Authenticator is a small app that runs on your phone and shows a different code every 30 seconds. It works like entering a password - tell WordPress the right code that’s showing on your phone or you won’t be allowed in.
There are a number of more advanced techniques that you can put in place to further secure your site, such as installing an SSL certificate, configuring a limit on failed login attempts, lock down your directory permissions, and rename your login URL. But simply preventing the bad guys from logging into your site is a huge step in the right direction.
12. Delete images in your media library if you don’t use them
Over time your website’s media storage library can get pretty full. Especially if you haven’t been saving your images as jpg or png and compressing them prior to uploading.
Also, if you’re like me, sometimes you accidentally upload the wrong version of an image and don’t go back to delete it.
These images live in your website’s database, which doesn’t have infinite space. Eventually, it fills up and slows your site’s performance down. Depending on your host, you’ll run into other issues (increased costs) if your volume of files gets too large.
The solution to these problems is straightforward, even if it’s time-consuming; go through your media library and delete photos you’re not using.
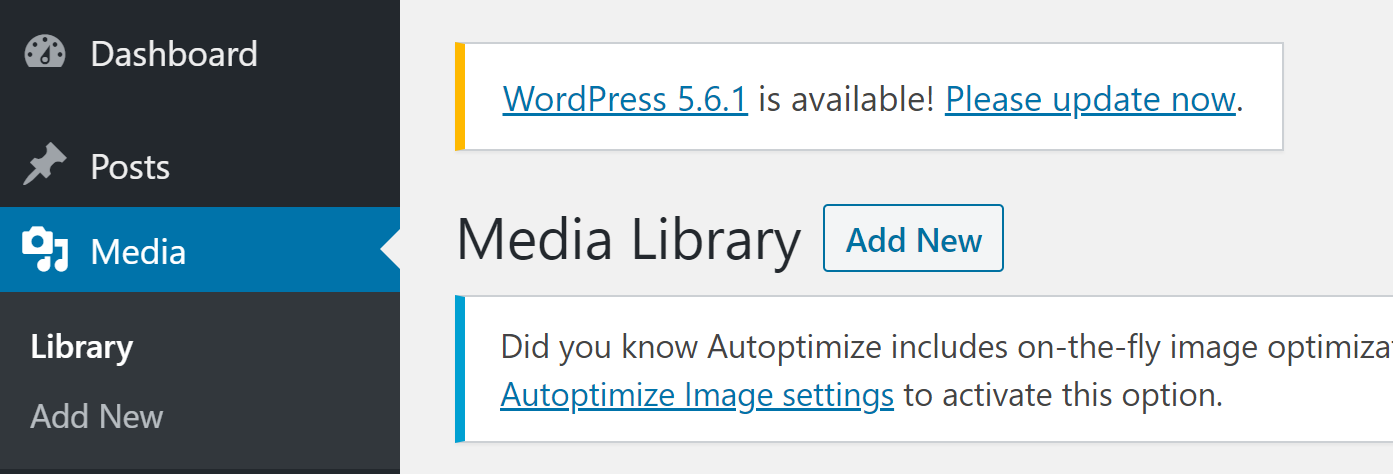
To do this, open Media > Library
Then click on an image you want to delete and hit the “Delete permanently” link.
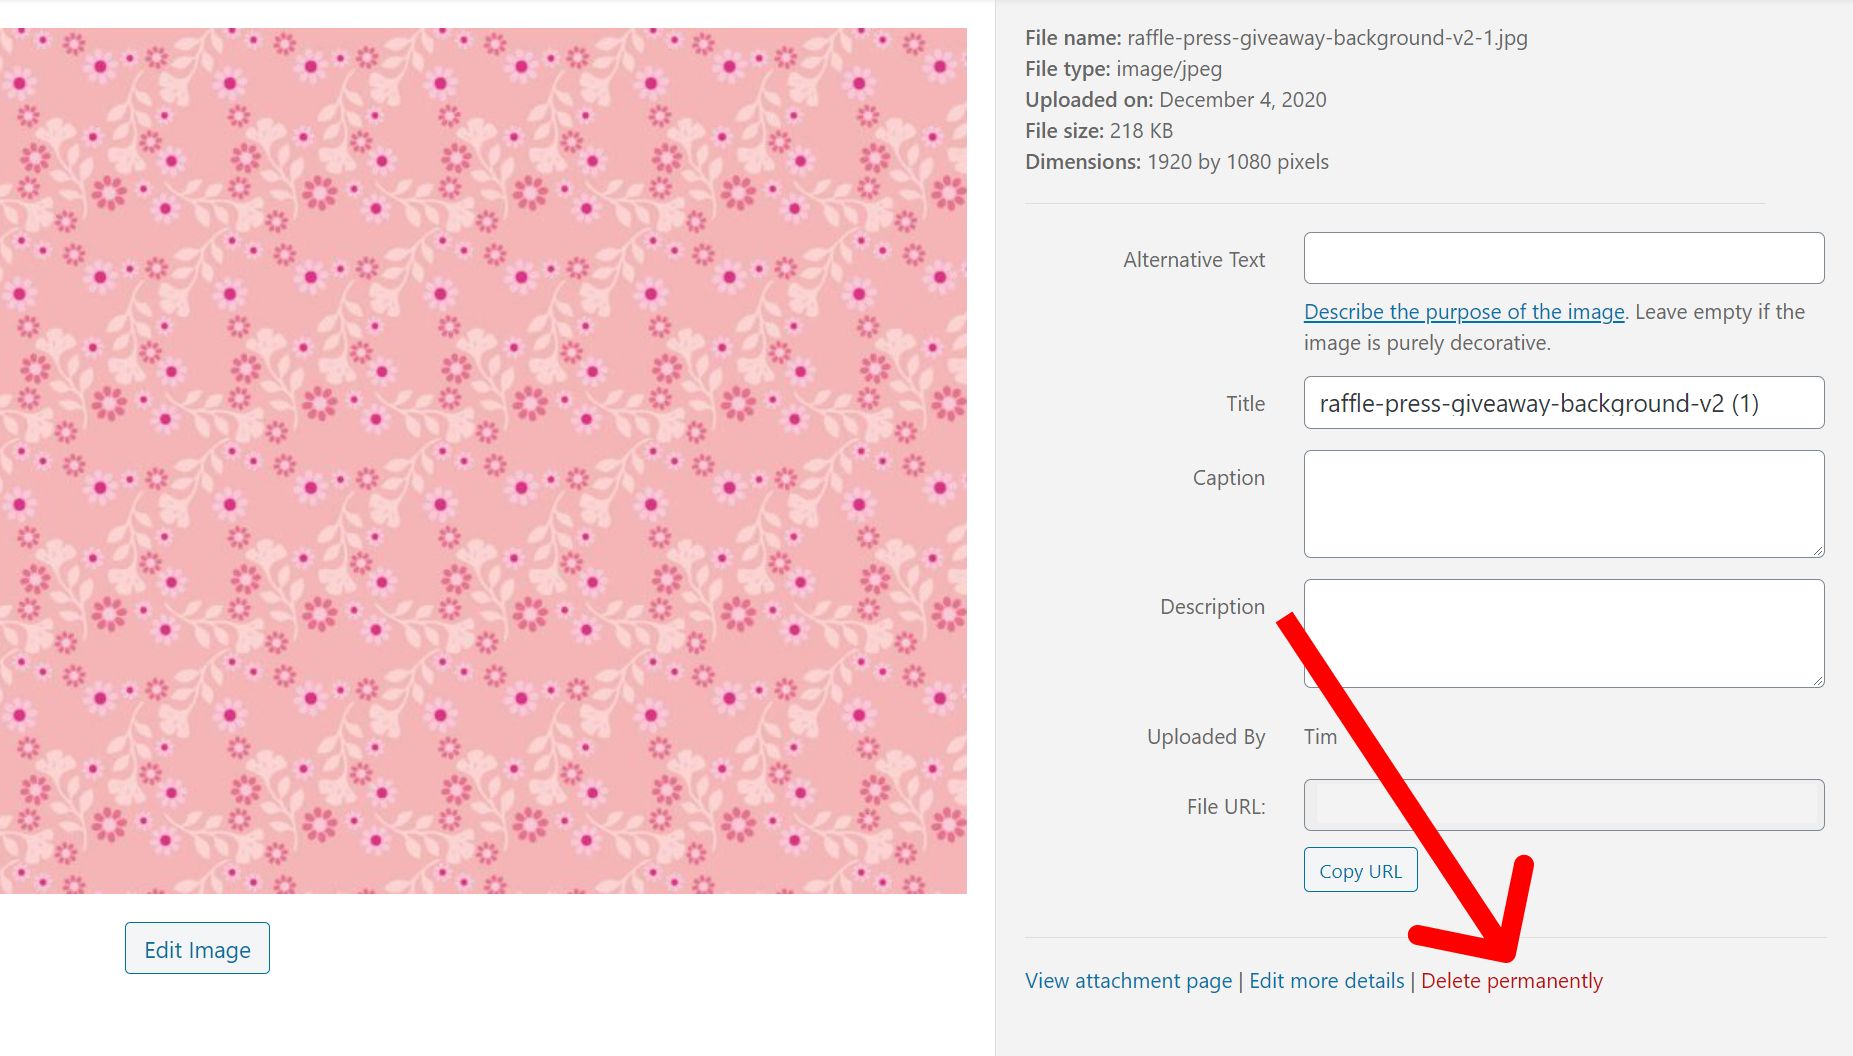
This is all good and well for duplicates where you can easily spot the image that’s being used, but it becomes a struggle if you don’t know if an image is being used somewhere on your site.
Media Cleaner is a plugin that can help you figure out which images aren’t being used and can be deleted. Once you’ve installed and activated Media Cleaner, go to Meow Apps > Cleaner.

Hit the “Access Media Cleaner Dashboard” button. On the dashboard, you’ll see a few warnings that are worth paying attention to. In particular, backing up your database and adding the trash folder for your media library.
Start by taking a backup of your database. There’s a handy guide here if you’re unsure how to tackle this process. Next, pretty the “Automatically write this line” button to avoid permanently deleting your files, as an extra precaution.
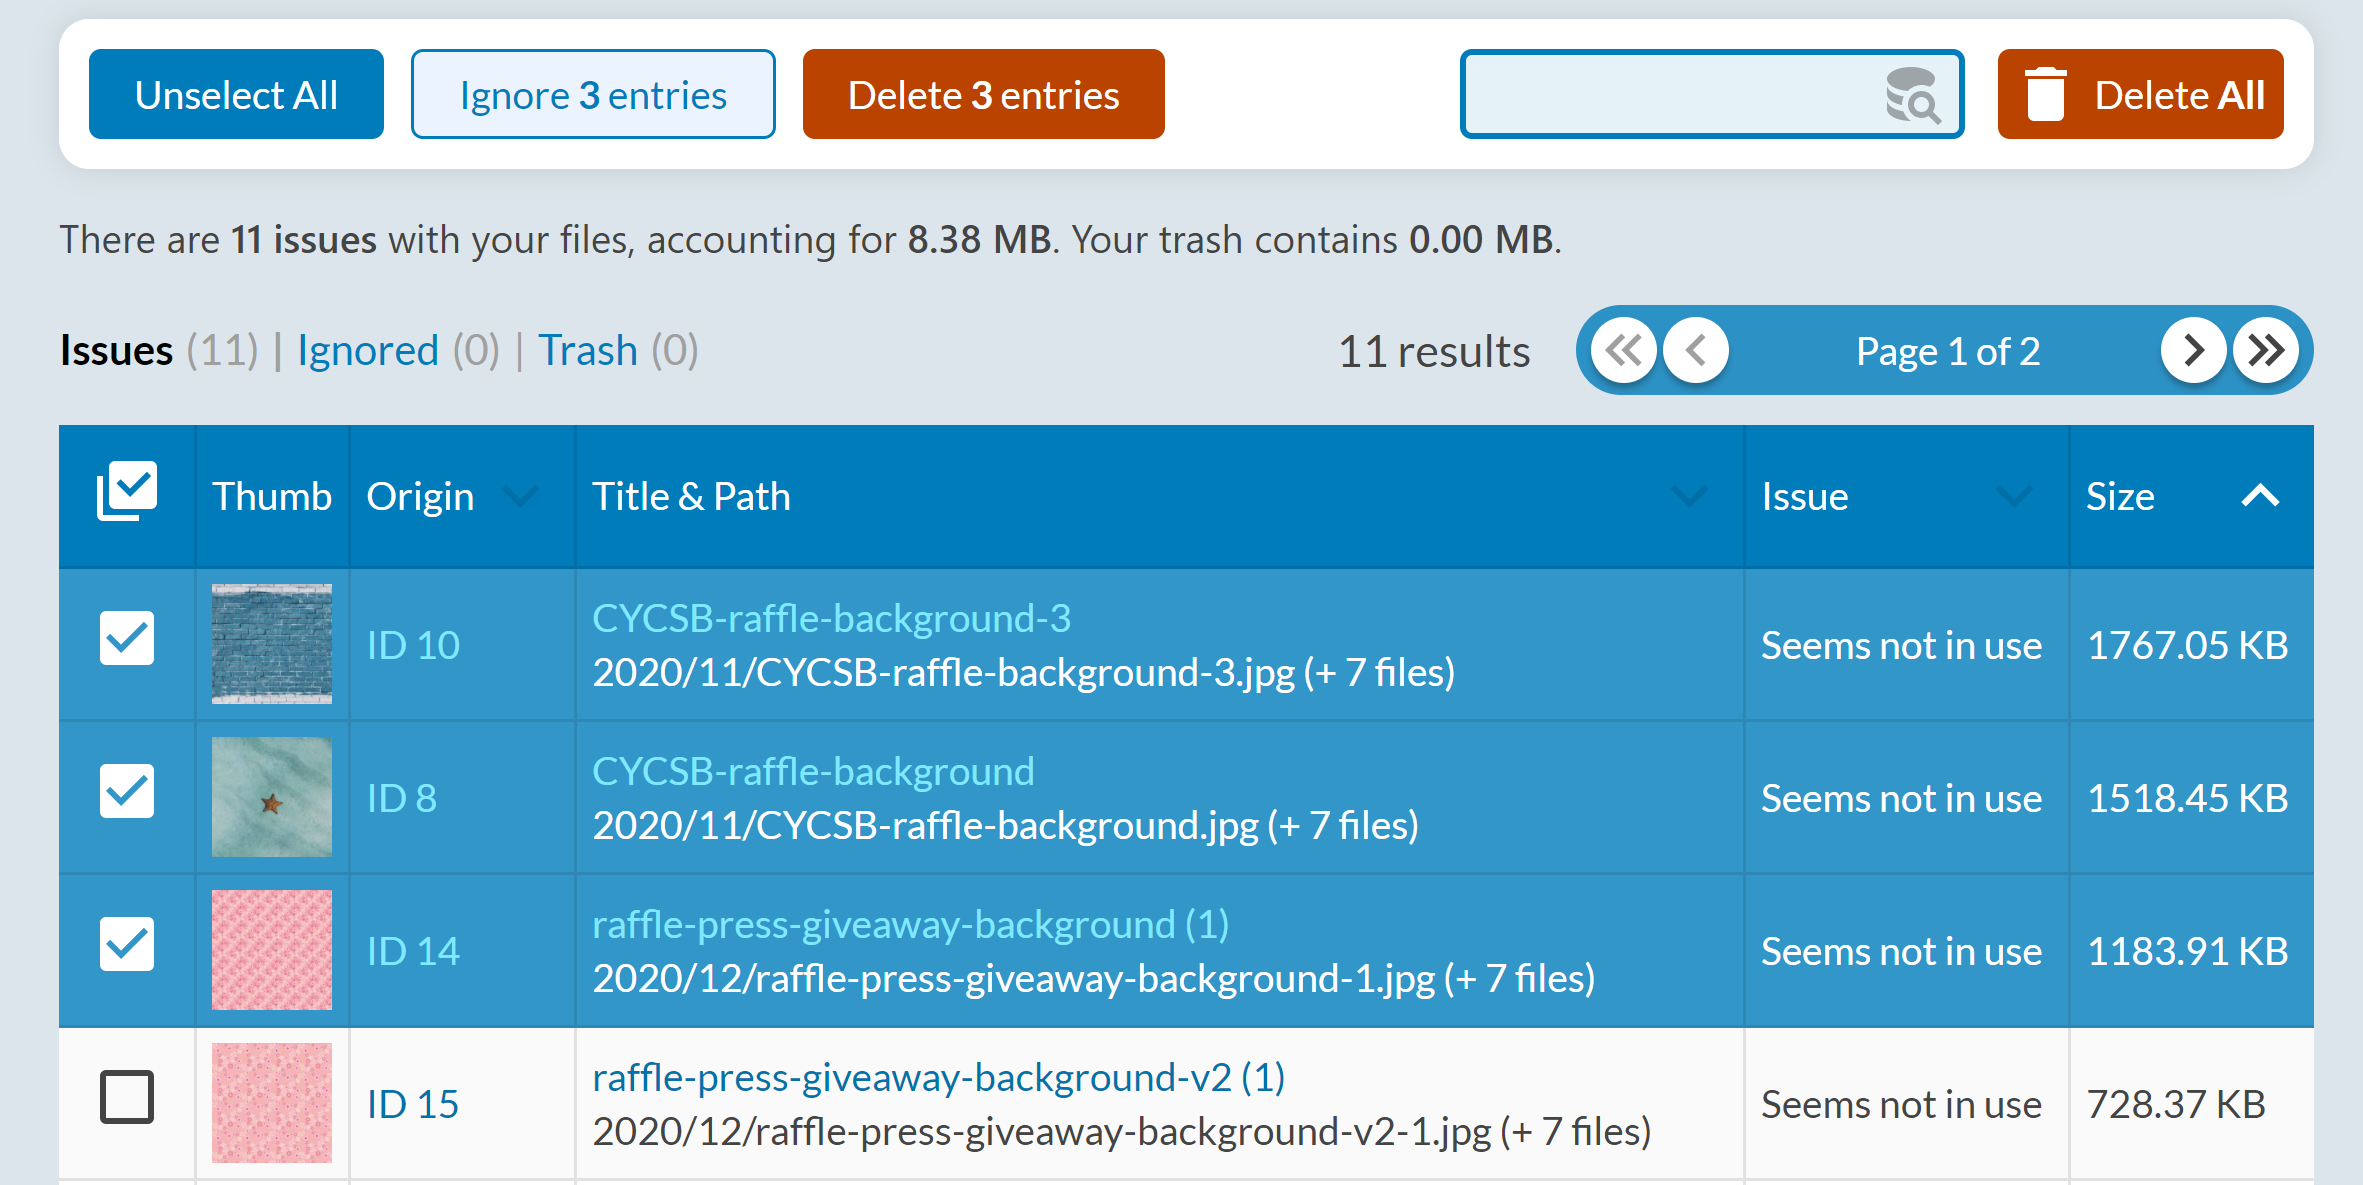
When you’re ready, hit the “Start Scan” button. A list of images that aren’t currently being used should return. Go through the list to make sure you’re certain no active images have been accidentally included.
Tick the checkboxes of the images you want to delete, or if you’re feeling adventurous, hit the delete all button.
With that, you’ve done all the basic changes you can to improve your website’s performance. Go ahead and run a performance test to see what kind of increases you’ve unlocked.
The next section will focus on changes you need development help to execute. At this point, if your site is still dragging along and you simply want it to go faster - reach out to us. We’ll get your site back to top performance with a few hours of development work.
3. Advanced fixes you need technical support for
If you’re ready to tackle these next steps, you should be comfortable with basic development principals, server management, and have a solid grip on how WordPress works under the hood.
With the warnings out of the way, let’s get into the advanced WordPress optimisation tips and tricks.
13. Use the Roots.io ecosystem
The entire Roots.io ecosystem (Trellis, Bedrock and Sage) makes some very wise design and technology decisions that can wildly improve the performance, security and useability of your WordPress website.
We wouldn’t recommend rebuilding your entire website if you can avoid it. But if you’re serious about achieving elite performance, then the combination of Trellis, Bedrock and Sage is going to get you there.
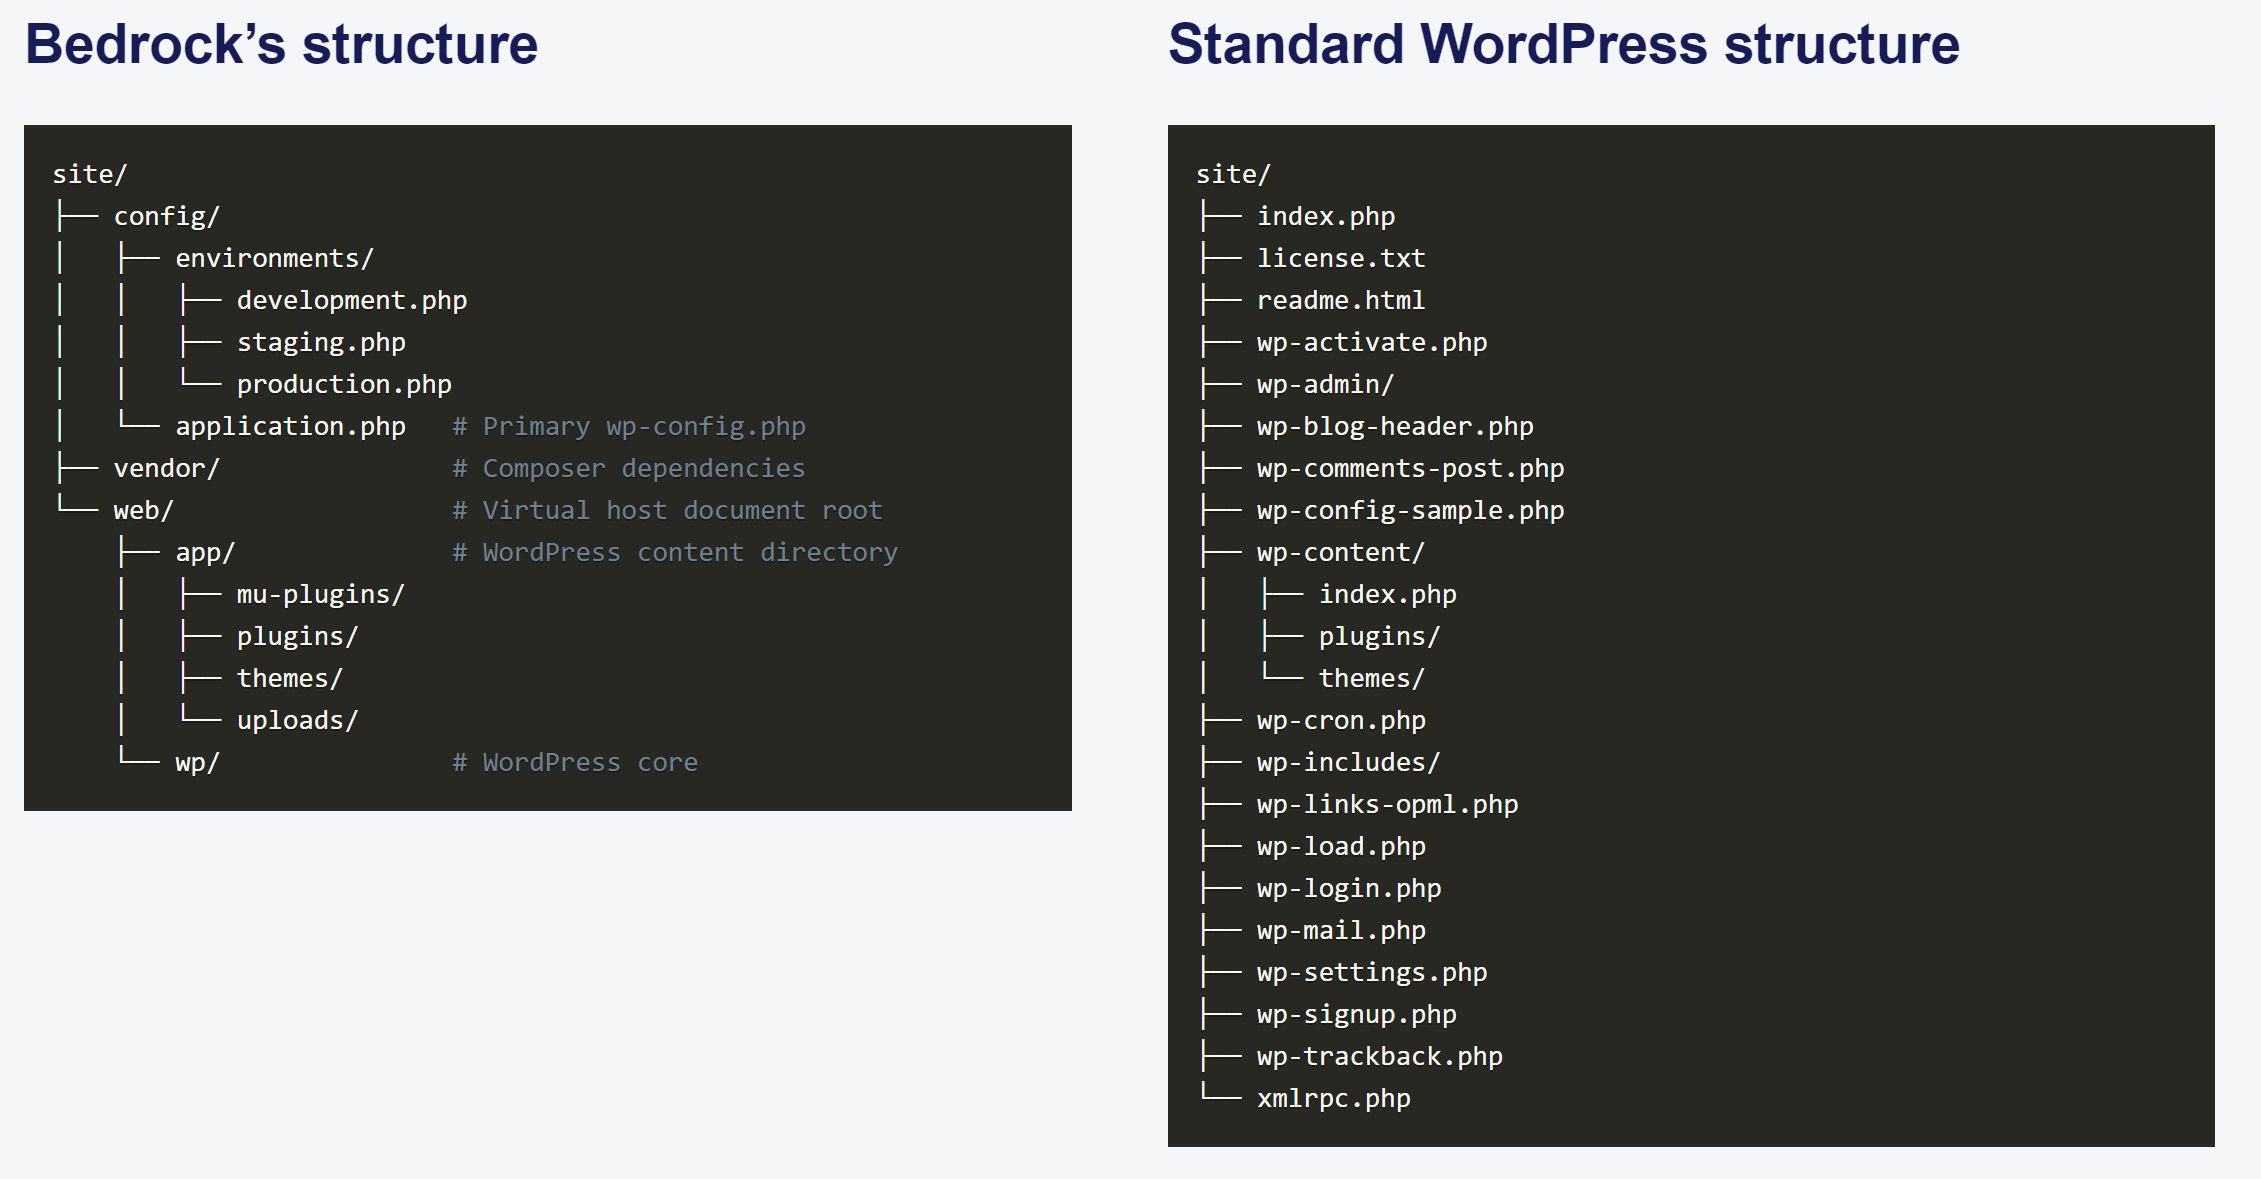
Bedrock
Bedrock really is the way WordPress should have been designed. In a nutshell, it migrates some of the code out of core directories, making it easier to configure network file systems, and generally keeping the development process neat and tidy.
Bedrock also implements a more maintainable way to install plugins from official repositories. This brings your workflow closer to Composer or NPM when it comes to installing plugins as you would packages. This ensures that all developers, designers, and test servers are running the same version of the plugin, reducing the possibility of errors or bugs.
Trellis
Trellis is really where the performance benefits are hiding. It's a shortcut through the usual sysadmin setup of configuring an environment. Trellis achieves a standardised development / staging / production environment by using Vagrant boxes and virtual machines. It also runs a modern LEMP stack, which incorporates Nginx, providing some serious performance benefits over the traditional web server, Apache.
15. Optimize your HTTP requests
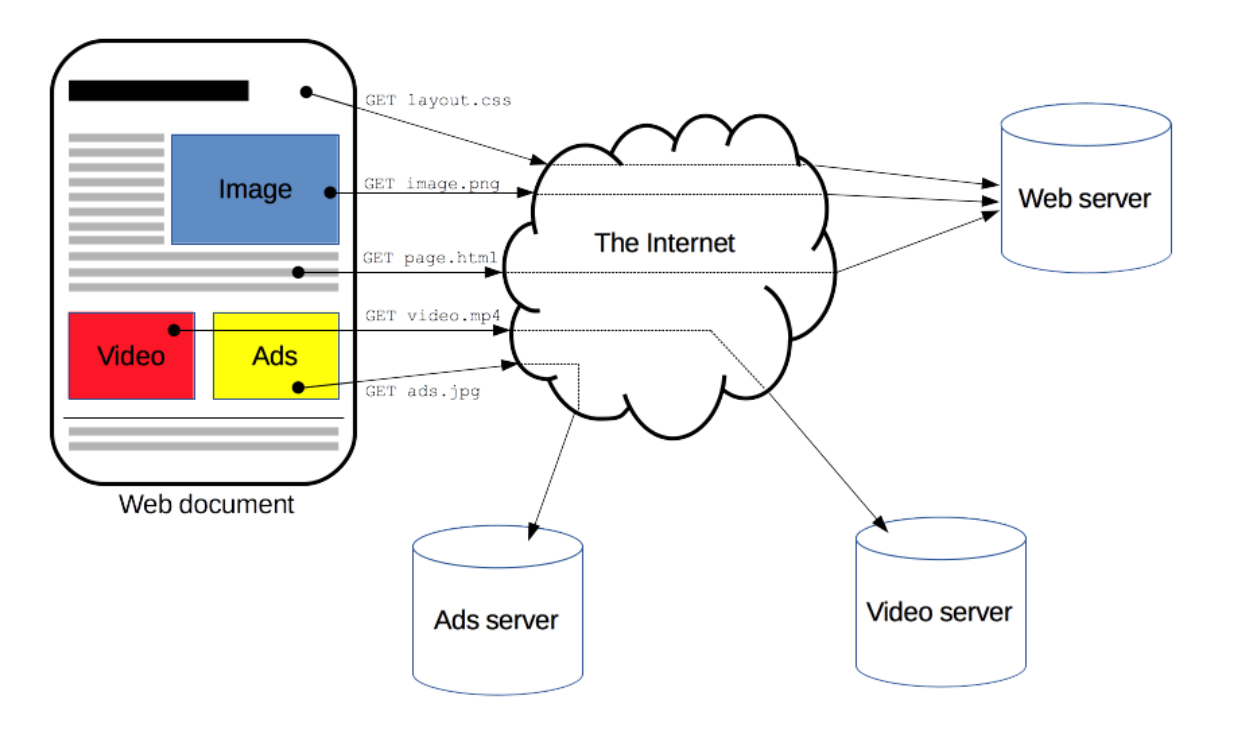
Anytime your website needs to call an external resource, it’s adding overhead. Establishing a TCP connection, sending the request, waiting for the answer and then sending the response code takes time. Albeit a very small amount of time, but when it’s repeated the number adds up.
Having a high number of small data HTTP requests is going to be much slower than a single, larger data HTTP request.
The goal in minimising your HTTP requests is to batch similar files. The best example is using a single CSS stylesheet for your website and running all scripts from a single file.
Another way to reduce your HTTP requests is to store your resources on a single domain. Every time your browser needs to load a resource hosting on a new domain it needs to perform a DNS lookup.
16. Avoid using redirects
Google is most often the authority when it comes to “how to do things the best way” and they say ideally you should cut out redirects entirely.
If your site is large and growing, this might not be possible, but you should at least focus on reducing the number of unnecessary redirects, especially to static resources.
A simple (and free) way to identify your site’s redirects is to download Screaming Frog and run a quick report on your redirects. This will also help you work out which redirects can be ditched and which should stay.
Keep a close eye out for any chained redirects - they’re the ones you’ll want to fix first as they’ll usually load the slowest. If you do find any, edit your .htaccess file to point all of your redirected pages to the most recent version of the page.
17. Set up bytecode, object, page, and CDN caching
Bytecode caching
Amazon explains the importance of bytecode caching elegantly;
Each time a PHP script is executed, it gets parsed and compiled. By using a PHP bytecode cache, the output of the PHP compilation is stored in RAM so that the same script doesn’t have to be compiled again and again. This reduces the overhead related to executing PHP scripts, resulting in better performance and lower CPU requirements.
Using bytecode caching is as simple as setting up OPcache when you’re configuring your environment.
All you need to do is run sudo apt install php7.0-opcache. You may need to change some settings to best suit your server’s configuration.
Object caching
Object caching stores database queries so they can be brought up quicker the next time they’re needed. This helps speed up PHP execution time, reduce the load on your database and get the page content loaded quicker.
WordPress leans on its database a lot. This is no surprise, given it’s a content management system. Anytime it needs to show blog articles, images or other content to the end-user, there are database queries being made.
Without object caching, the request to access these files are repeated for every user that makes a similar request. This is bad news even on a smaller scale - say 100 people trying to view your blog’s archive page which loads 50 articles.
The answer to object caching is Redis. Redis is an open-source, in-memory data structure store, used as a database, cache, and message broker.
Before we go any deeper on the topic, we should point out that there are benefits to using Redis but it can cause issues for WordPress, and the overall performance benefit your site will receive is minimal unless it’s running at a large scale (at least 1000 queries a minute).
Also, keep in mind that Redis requires a LOT of RAM, so you’ll need to bump up your environment’s resources to get it humming.
Redis requires a bit of installation and configuration that we’re not going to cover in this article.
Page caching
Page caching cuts out a ton of PHP and database queries by storing an entire version of a page’s HTML in memory. This means WordPress doesn’t have to regenerate the page, it can simply serve the stored version.
There are plugins that can achieve page caching, but we recommend configuring Nginx’s FastCGI Caching Module to handle page caching. This will require you to first be using Nginx instead of Apache (you should be doing this anyway) and then follow some steps to configure the module.
CDN caching
For the uninitiated, Content Delivery Networks (CDNs) are global networks of servers that deliver files. This network can be leveraged to serve cached files to users when the origin server is geographically far away.
A good example of this can be seen with a lot of DigitalOcean’s servers since they have data centres in Singapore and New York. If you live in Australia, as we do, and your website is hosted on DigitalOcean, then the server could have a 400ms initial load time simply due to it being on the other side of the world.
CDN caching is the answer to this problem. By loading your site’s files such as images, videos, JavaScript files, and CSS, they can be delivered by servers closer to the user.
The practical implementation of CDN caching is setting up Cloudflare. There are other options, but we’re big fans of Cloudflare’s service. For most implementations, it’s free and very easy to configure. There’s a great WordPress plugin that does most of the heavy lifting for you.
18. Update PHP
There’s nothing surprising about this suggestion. Each incremental release of PHP brings about an increase in performance.
PHP 8.0 shows an increase of around 3% on its baselines when compared with PHP 7.4.4. This becomes a much more obvious issue if your server is running an older version of PHP (anything before PHP 7).

The fix can be simple. Jump into your server and update the version of PHP.
A word of warning before you do this. PHP 7.2 brought with it some fairly significant changes that may impact other technologies running your website, such as jQuery. Before you pull the trigger, make sure you back everything up and has a quick rollback plan in case the changes go south.
Even better, configure a Vagrant or Docker instance to replicate your production environment and run the tests locally before pulling the trigger.
19. Remove old plugin database tables and files
When you’re testing out new plugins to see which one is going to be the best fit, do you read through extensive articles and reviews and decide ultimately to install only one plugin?
Probably not. If you’re anything like me, you’ll install four plugins to work out which one is the best and then move forward with that one. I’ll circle back, deactivate and delete the other plugins when a winner has been crowned.
If all plugins were engineered according to the standards set by WordPress then this would be the end of the conversation.
For one reason or another, a lot of plugins don’t follow these guidelines.
The deletion process removes some of the plugin’s footprint from your server. You will no longer be able to see the plugin on the administrative dashboard, but the database tables and rows and other files that were installed with the plugin often do not get deleted.
If you’re testing out a lot of plugins, over time you run the risk of bloating your database and increasing your site’s disk requirements. This impacts your site’s performance and the amount of money you need to pay for hosting.
Kinsta has written a killer guide on cleaning up your database after uninstalling a plugin. This guide will give you all the steps to working through phpMyAdmin, identifying and removing the orphaned tables, and finding and removing old files.
20. Use Lazy Loading Images
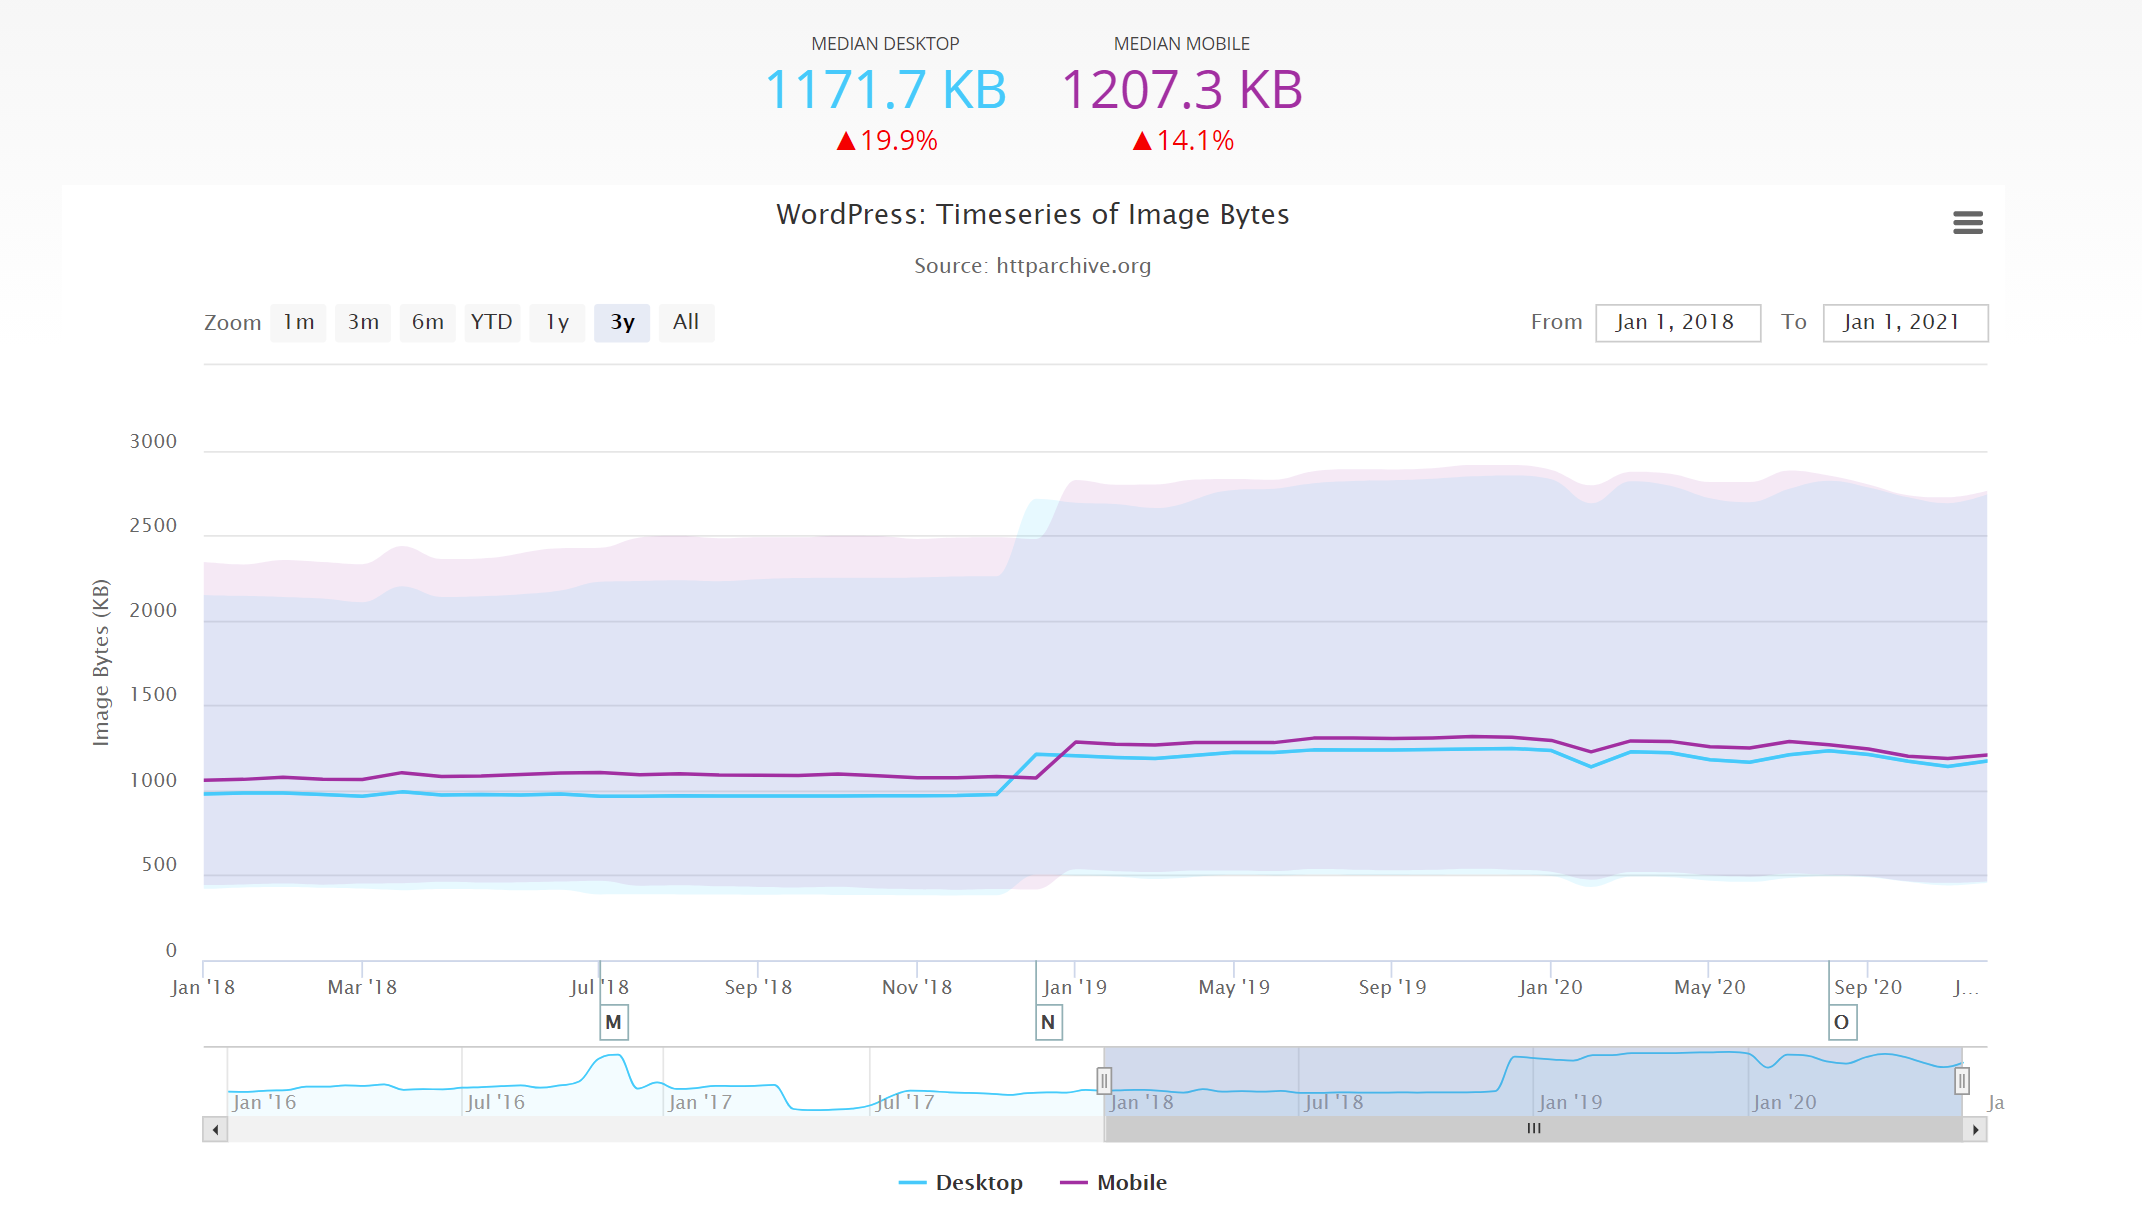
The median average size of a WordPress page across the web is 1171kb for desktop and 1207kb. Images account for around 65% of this weight. Images are critical to helping your user understand and engage with the content, so we can’t just get rid of them. And there’s only so far you can compress them before quality becomes an issue.
The answer to this problem is lazy loading.
Lazy loading is a technique where only the visible content of the page is downloaded. Downloading and rendering of content below the fold is delayed until the user scrolls further down the page.
Lazy loading works like this:
- The page is downloaded and built by the browser.
- Images are not downloaded initially
- JavaScript is used to determine which images need to be downloaded, according to which part of the screen the user is viewing
As the user scrolls down the page, images and videos are downloaded as they are viewed
In our experience, poorly optimised images account for the majority of page speed issues. Lazy loading this content doesn’t completely fix this issue, but it certainly alleviates the issue.
Even for a page that’s well-optimized, running on a static site (like this one you’re reading) would suffer poor performance without lazy loading, simply due to the sheer volume of content.
The quickest way to get lazy loading working on your site is a plugin we mentioned earlier in the article; Autoptimize. Using this plugin for minifying your files and lazy loading saves you from having to install multiple plugins.
Head over to Plugins > Installed Plugins. Find Autoptimize and select Settings. On the settings page, pick the images tab then tick the Lazy-load images checkbox.
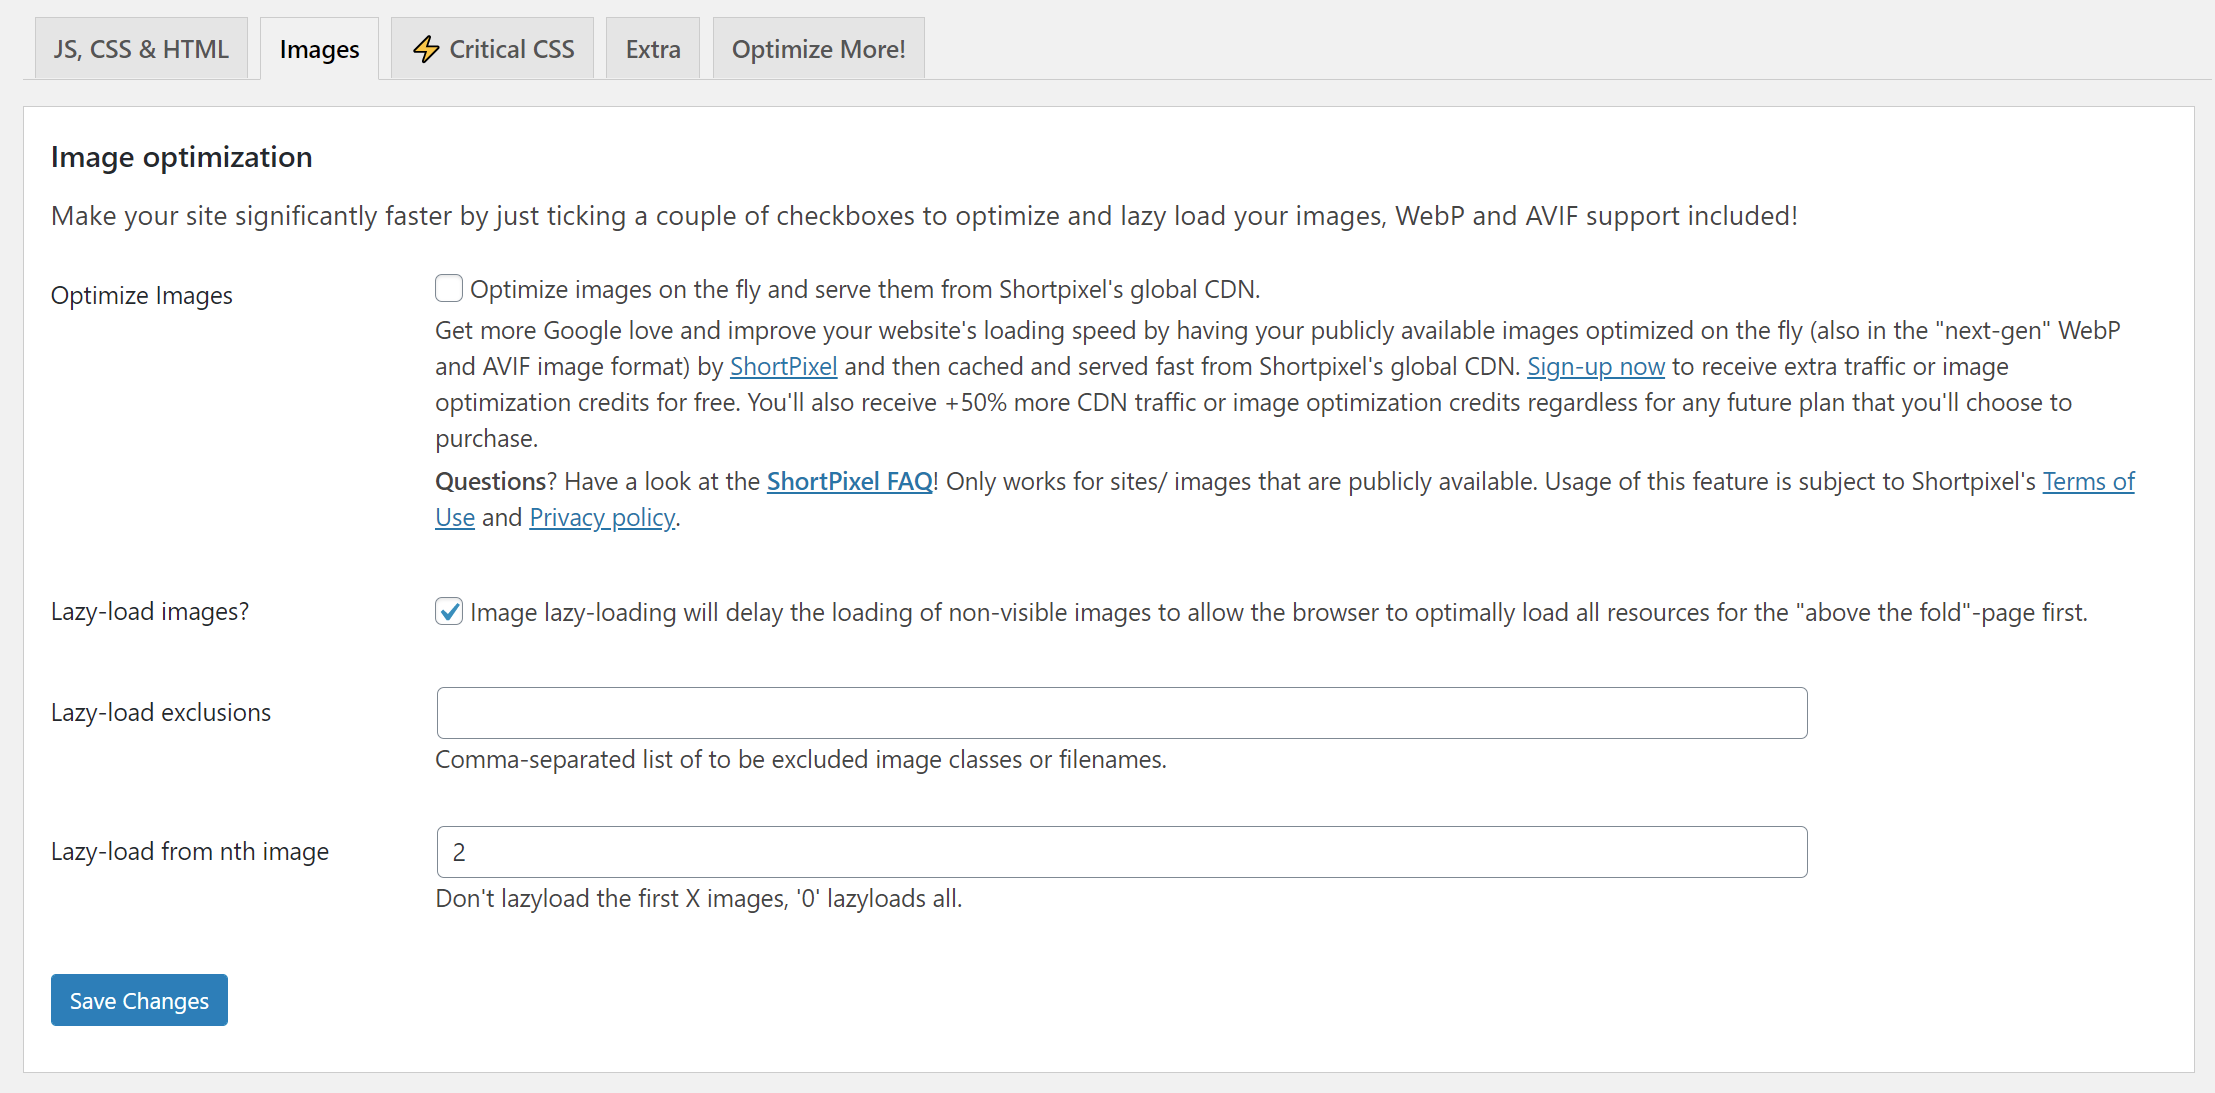
Hit Save Changes and you’re done.
21. Optimize your font requests
If your site is calling external fonts, such as those provided by Google Fonts, you’ll want to combine them into one request.
This sounds obvious, but if you make multiple trips to Google Fonts to pick out the fonts required for your website, you can end up with multiple stylesheet requests.
The fix to this issue is simple; combine these requests together. By default if you’re using Google Fonts and shopping around for multiple fonts they will be combined into one request string automatically:
<link href="https://fonts.googleapis.com/css2family=Lato&family=Roboto:wght@100&family=Stick&display=swap/" rel="stylesheet">There are some other tweaks to your font requests that Google themselves suggest. Firstly, avoid using @import before an external CSS request. Internet Explorer suffers performance issues when one external stylesheet links to another.
They also suggest you put your font requests early in the page’s structure. Especially make sure to add these requests before any scripts.
Finally, don’t request fonts you’re not using. It sounds obvious, but it’s worth keeping in mind because if you accidentally request an entire font library it will add a significant amount of weight to your page.
22. Enable web front preloading
If you’ve ever endured a really slow internet connection and watched a webpage slowly come to life, you’ll be familiar with the brief loading of fonts that seem to magically change styling after a fraction of a second.
This behaviour is caused by browsers completely loading the render tree before requesting the required fonts. In a nutshell, this means that your browser will get all of the content loaded and then request the fonts you want to use.
The problem with this approach is that your site’s content may be ready to roll, but your browser is off downloading fonts, holding the entire process up, or causing a brief moment where the font loads and then changes styling.
Fixing this issue is fairly simple. All you need to do is add the attribute to your font requests.
You do need to be careful that the font you’re preloading is exactly the same one specified in your CSS. If the fonts required in your CSS change for whatever reason, then you could be forcing the visitor to preload a different font than the one that will be used on the page, ultimately making them load two fonts instead of one.
23. Reduce the number of saved post drafts
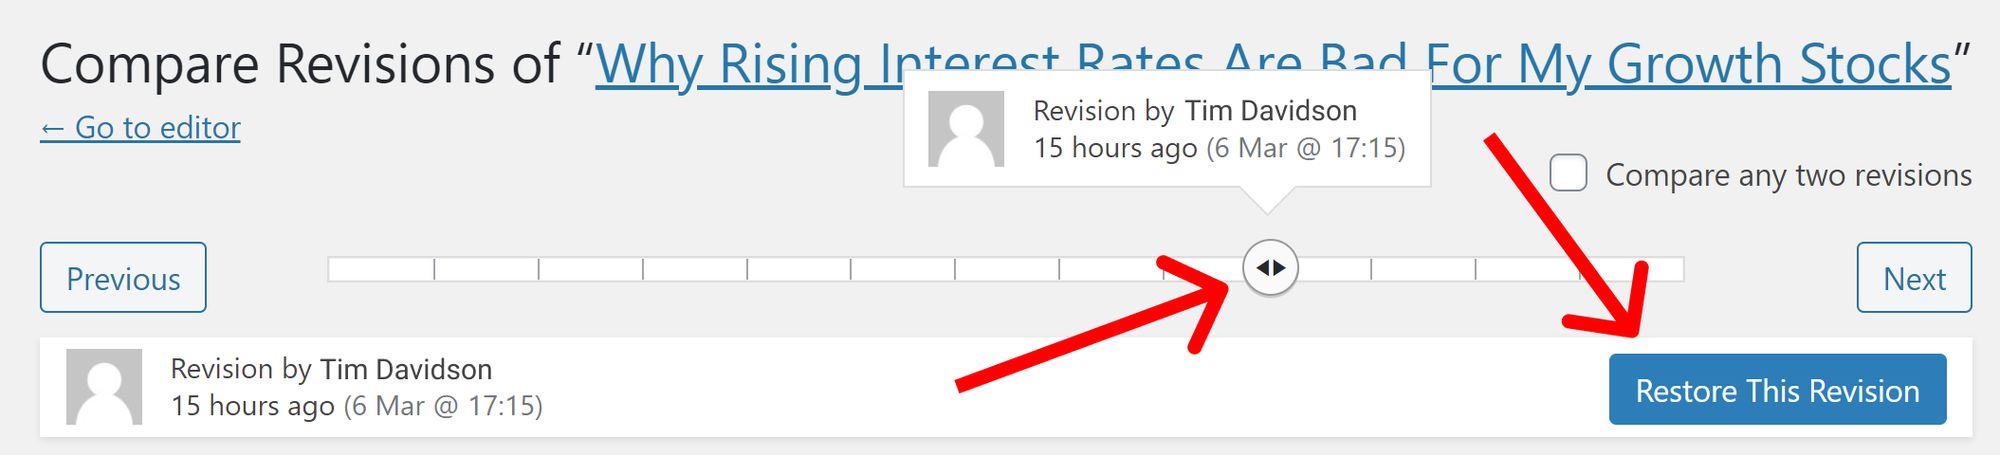
Every time you Save Draft, Update or Publish a WordPress article, a new revision will be created. Even if you’re not making any changes on the page, WordPress will save a new revision every 60 seconds. These revisions act like version history for your post and allow you to roll back to a previous version.
This is super helpful in cases where you accidentally make changes to a page that you didn’t mean to, or find that something on the current page is inaccurate and you need to urgently bring up the old version.
WordPress provides a simple slider tool that lets you drag forward or backwards to find the correct version of your post to spin up.
However, there is no automated process to remove revisions from the database, so over time, they can build up such a volume that they start to slow down the performance of your website.
This problem becomes more realistic if you have a lot of pages and posts, since they’ll all receive revisions whenever changes are made, amplifying the problem.
As a solution, you could simply turn off WordPress revisions through modifying wp-config.php file or using the Disable Post Revision plugin. Although we wouldn’t suggest doing that. Revisions are a very handy feature and one that we at Clean Commit use a lot.
A better option is to clean up your old posts using WP-Sweep. WP-Sweep is free, which is always nice, and it provides an easy interface to play around with, and a simple API if you want to plug straight in.
Once you’ve got WP-Sweep installed, head over to Tools > Sweep. This screen breaks down the posts that will be “swept”. Make sure you’re not going to lose anything important before pulling the trigger, then click on the Sweep button.
It is possible to log into phpMyAdmin and delete revisions manually through the SQL section by running:
DELETE FROM wp_posts WHERE post_type=”revision”;
However, this is a broad brush stroke and will delete all of your post revisions. For this reason, we suggest sticking with WP-Sweep. If you’re worried about plugin bloat, then uninstall it once you’re done.
A good option once you’ve cleaned up your old revisions is to put a lower cap on how many revisions WordPress stores.
Assuming that you’re comfortable making changes to your theme’s files, then jump onto your hosting server’s cPanel, log in via SFTP or SSH in, then open up your site’s wp-config.php file.
Add this line to the bottom of your file;
define(‘WP_POST_REVISIONS’, 5);
We recommend sticking to 5, although you can make this whatever number you want. Most of the time when you need to roll back to a previous change, it’s the latest revision you’ll end up choosing so don’t make this number too big!
24. Choose Nginx or LiteSpeed over Apache
Unlike Apache, which runs on a process-driven architecture and creates a new thread for each request, Nginx is an event-driven architecture and can handle multiple requests within one thread.
Nginx is the king these days. It’s grown beyond just being a web server. It’s now used as a reverse proxy, load balancer, mail proxy and for HTTP caching.
According to the guys over at serverguy.com, Nginx performs at 2.5 the rate of Apache when serving static content. While this benchmark doesn’t translate directly into how quick your visitor’s page will load, it’s a statistic that’s worth taking notice of if your site has a large volume of static content and a lot of visitors.
If you want to live even closer to the bleeding edge of web server technology, then LiteSpeed Web Server (LSWS) is even faster than Nginx. The performance difference between LSWS and Nginx is not as big as the gap back to Apache, but it does transfer files quicker, use less CPU and memory.
The only big downside of LSWS and why we would recommend sticking to Nginx is that it’s installation and configuration is complicated. It hasn’t been widely adopted across the web yet so the support materials and developer ecosystem are still immature.
Given we’re recommending you stick with Nginx, what’s the next step?
If you’re using sub-optimal hosting like Bluehost, GoDaddy, or a similar provider that only lets you use cPanel to access the server then you’re probably out of luck. Loading new web server software is out of your hands.
However, if you’ve chosen to run your site on DigitalOcean, Linode or Cloudways, then you have the freedom to install Nginx.
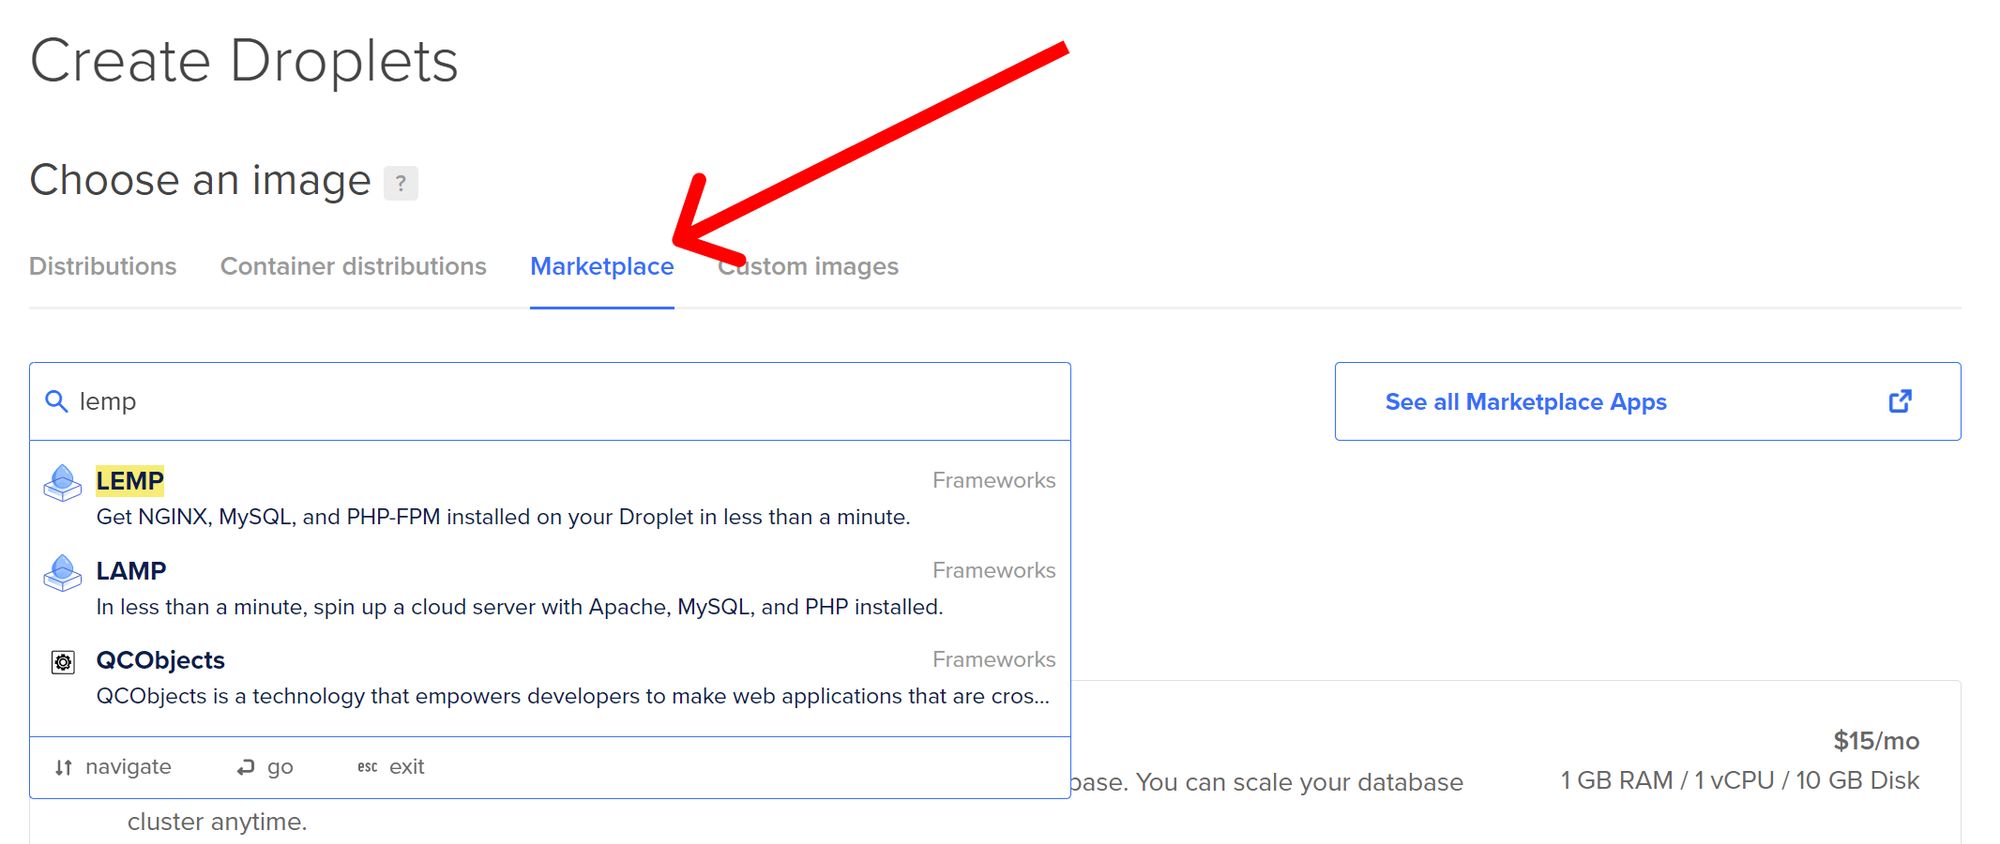
If you’re spinning up a new site on DigitalOcean, you can choose to install the LEMP (Linux, Nginx, MySQL, and PHP) stack one-click installer and then load WordPress on top.
If you’ve made it this far then you probably already have a good grip on installing WordPress on Linux distributions. If you’re new to the process, then it can be a bit of a learning curve. We recommend following the instructions DigitalOcean has written for the process.
Other suggestions
In preparing this guide we did a ton of reading. We went over a lot of other guides and research pieces.
Some of the suggestions that came up were interesting and may improve page load times, but weren’t necessarily practical.
...Or they were practical but wouldn’t improve page load time.
Most of the ideas were at least worth discussing, so we’re breaking them down in this section.
1. Split up your long posts
Yes, this will increase your page load time. The less information the browser has to load, the quicker it’s going to go.
But this is kind of silly. Blog articles or any kind of content is written to a certain length for a reason. Usually because that’s how long the article needs to be.
Imagine if we split this article into five separate posts. The usability would decrease significantly, and you’d still end up loading five different pages, so the sum total of load time would increase.
Long posts also generate longer user engagement and target higher volumes of keywords, which is lost when they are split up.
So we’re calling this tip a bust. Don’t split your posts up. If you’ve followed the rest of the tips in this article, then even a really long post type will load quickly.
2. Secure your website with SSL
You should absolutely do this.
Not only does running SSL add a protected layer of security to your site’s data, but it’s also become important in Google’s eyes, so your content will be ranked higher than a site that’s not secured.
However, don’t expect a performance increase from adding an SSL certificate to your site. If anything, you should expect a very small drop in performance because there are additional actions being taken by the server to ensure the connection has not been compromised each time it serves a page.
To summarise; definitely get your site secured with an SSL certificate, but don’t expect it to do much for your slow page load times.
3. Ditch WordPress and go with a static site to get to perfect performance
This is a legitimate option for some but a fairly impractical tip for most.
If you’ve got a WordPress site that’s running slowly, you’re probably not in the market for completely blowing it away, redesigning a new site, installing new technology, and working out how to migrate your old content.
That being said, if you are in the position to make the jump to a static site generator like GatsbyJS, the performance benefits are immense.
Static sites cut out all the dynamic interactions that happen when a user visits a new page and the backend code running on the server has to figure out what data they should be seeing.
GatsbyJS brings about a number of other great optimisation benefits such as serving images in a WebP which is a new generation format that boasts a 26% reduction in lossless file sizes when compared with PNG. Keeping in mind that images make up roughly 65% of average page weight, this can account for a huge efficiency boost.
To wrap this point up, yes static sites are awesome. Yes, you should choose this technology. Yes, it’s our preferred web technology.
…but no, this is probably not a helpful hint for anyone that’s looking to improve their WordPress website speed.
Wrapping it all up
We’re passionate about making websites go faster and achieving ultimate performance. The consequences that come with running a slow website can have a significant impact on your business’s performance.
Getting your WordPress website running fast and smooth is going to help your posts rank higher on Google, keep your visitors engaged, and improve your chances for achieving your website’s ultimate goal.
This was a bit of a monster guide in terms of length, and we’ll be updating it frequently given how quickly the landscape changes.
If you have any suggestions or comments on tips we should add to the guide, please leave a comment below.


